Making a coiled sycamore seed

In a previous post I mentioned a course on coiled basketry I was taking with Polly Pollock at City Lit and described the different samples I had made.

The second half of the course focused on our own personal projects, developing the techniques we had learned to produce a piece or series of samples inspired by the seedpod theme.

My inspiration actually came from a piece of driftwood.

driftwood

It reminded me of a sycamore (US: maple) seed, so I thought I would try to weave something around it to create the “wings”.

At first I tried wrapped linear coiling with paper yarn, but it felt too solid and heavy – this was supposed to represent a floating, spinning seed.

linear coiling

So then I tried a more open weave approach, using blanket stitch with cordage, still with paper yarn. This worked better but was a bit too large.

sycamore seed sample

I tried changing materials, using a thinner cordage and enamelled wire for the blanket stitch. This was much better!

sycamore seed wire sample

There was still more experimenting to be done with varying the tension of the stitch to evoke the marks and form of the seed, but I finally got started.

sycamore seed wip

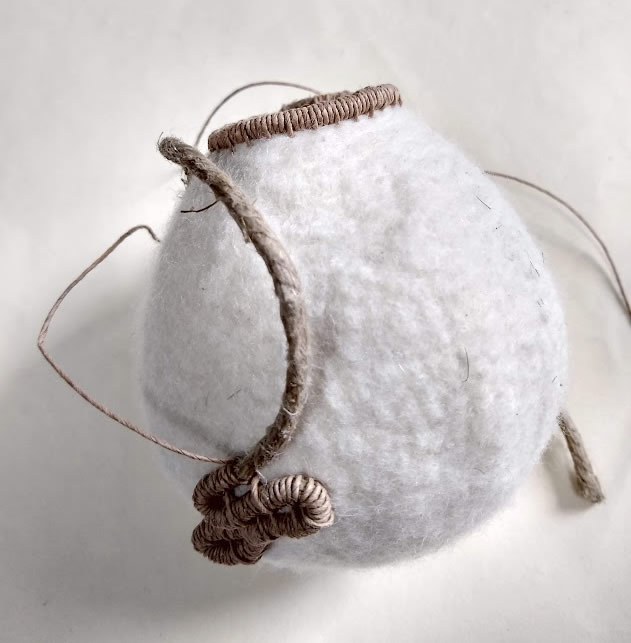
Finally, the finished piece:

sycamore seed

As ever, it was fascinating to see the very different pieces that everyone produced. I don’t have permission to post photos of others’ work, so you’ll have to take my word for it! But it was a fantastic course and I would highly recommend it.

There is also an exhibition coming up of work by students who are completing the two-year City Lit diploma in basketry. It’s at the Espacio Gallery in London from 23 to 28 July. I’ve seen some of the work on Instagram and it looks well worth a visit!

Different materials, different result

I seem to be getting more obsessed with basketry at the moment – I’m currently doing an eight-week course (one day a week) on coiled basketry with Polly Pollock at City Lit.

The first four weeks have been spent exploring different ways of starting baskets and working with different materials and stitches. In the second half of the course we are expected to work on our own projects around the theme of seedpods. So as you can imagine, this suits me down to the ground! 🙂

So far I’ve experimented with colour:

raffia coiled with hemp
Raffia coiled with hemp

With softer and harder materials:

fabric coiled with paper yarn
Fabric coiled with paper yarn
seagrass coiled with paper yarn
Seagrass coiled with paper yarn

With additions:

seagrass coiling with hare barley additions
Seagrass coiling with hare barley additions

And combining with felt:

coiling with felt
Coiling with felt

I also tried some “linear” coiling – creating rows rather than spiralling from the centre. The first sample I made with this technique had a thick core, which I wrapped with a stiff paper yarn. As I progressed, the piece began to twist quite spontaneously.

twisted coiled piece
Twisted coiling

I made similar pieces with the same core material but different wrapping fibres, which were all softer than the paper yarn. Some of these pieces twisted a little, others hardly at all.

I also tried making a piece with “ribs” to give a more defined form. I bound five lengths of seagrass together and coiled a thinner piece of green seagrass around them using blanket stitch. Because the seagrass ribs were relatively soft, the tension of the stitching tended to twist them slightly to the right, which made the final piece look a little unbalanced.

As a felter, I am used to shaping a piece while fulling it – the final form can look very different from the original! So I thought I would try reshaping this piece to emphasise the twisting even further. The paper yarn is strong but flexible, so this worked out quite well.

twisted coiled seedpod

This week we were working with natural materials, so I repeated this form using strips of cordyline as the ribs, dried daffodil leaves as the core, and waxed polyester string for stitching.

The cordyline was much stiffer than the seagrass, and I found that if I pulled the ribs together at the top, the coiled sections between the ribs bulged outwards, producing a completely different shape.

coiled daffodil leaves

It’s a useful reminder of how you can achieve completely different results with different materials, and making samples is a very worthwhile exercise. 🙂

Several types of smocking

I’ve experimented with Canadian, or North American, smocking before, here and here. But last week I attended a couple of workshops with Eileen Wedderburn in the fashion department at Morley College.

All the other students were fairly experienced dressmakers and wanted to apply the smocking technique to clothes. By contrast, I was more interested in using smocking to create sculptural effects.

We started with traditional English smocking, where the fabric is marked with dots before gathering it into pleats using the dots as guides. The pleats are then held in place by embroidering on top before removing the gathering threads.

Some stitches allow more elasticity to the pleats than others. Here’s a sample showing several different stitches.

sample of traditional smocking

From top to bottom, the stitches are:

  • outline stitch
  • cable stitch
  • wave stitch
  • honeycomb stitch
  • vandyke stitch
  • surface honeycomb stitch (with some beading).

Some of these stitches look quite similar but are subtly different.

The two rows of honeycomb stitch didn’t work too well on the sample because the pleats were quite tight, and I think it’s seen to best effect when there are more rows.

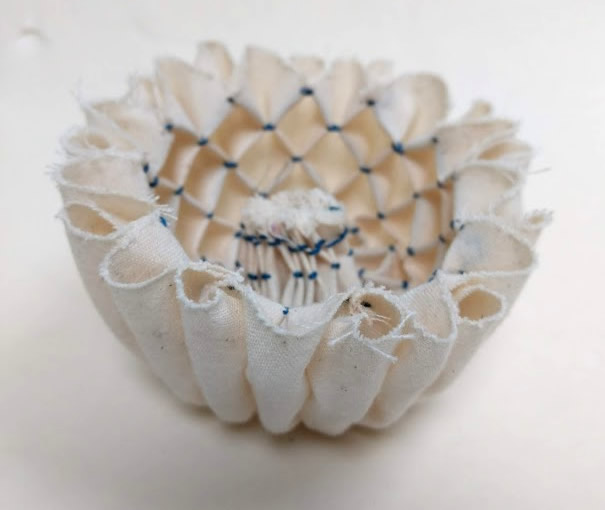
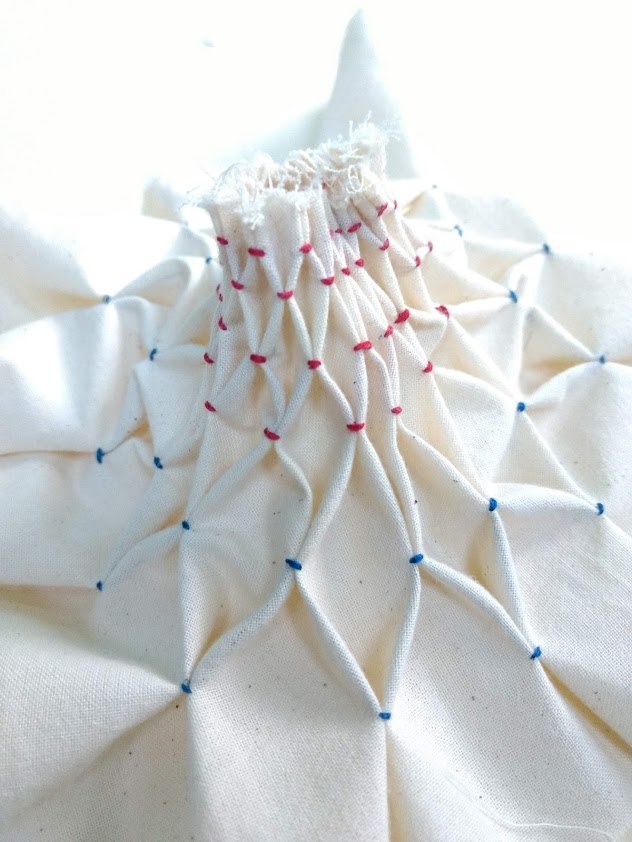
So I tried an experiment with radial smocking, where I started with a piece of fabric shaped like a ring doughnut, with the smocking dots in concentric circles.

circular smocking

Because the distance between the pleats is greater closer to the edge, the honeycomb effect is more obvious. The elasticity of the stitch also allows the structure to be manipulated – I actually like the tubular structure on the reverse side!

circular smocking circular smocking

I also made a piece where the distance between the smocking circles was greater at the edge. This led to a flatter structure that was not so conical.

circular smocking

On the second workshop we did some North American smocking, where, rather than gathering, the stitch pattern (not necessarily in rows) is used to manipulate the fabric when it is pulled up.

The stitching is worked on a grid, so to save time by not having to mark out lots of grids, we used gingham fabric. 🙂

First we tried a lattice pattern.

Canadian lattice smocking

Again, I was very taken with the reverse side, which was like puffy diamonds and curled up nicely into a ball:

Canadian lattice smocking (reverse)

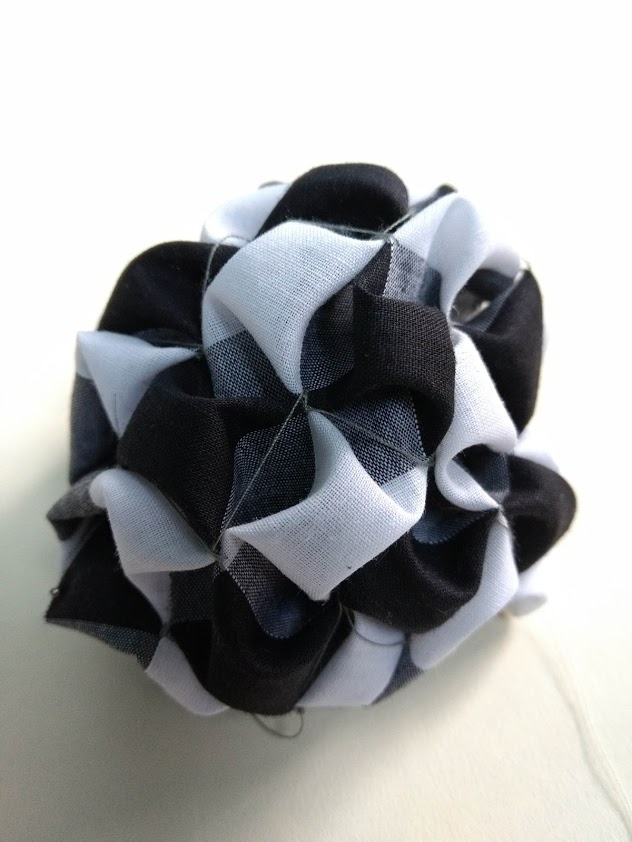
Then we stitched a flower pattern. This was interesting because, depending on where you started stitching, you ended up with black and white flowers (like me) or grey flowers, owing to the gingham pattern.

flower smock pattern

And the reverse pattern:

flower smock pattern (reverse)

I think this could be very effective stitched on thin prefelt and then felted.

Finally, I had a go at grid or Italian smocking. This differs in that, rather than creating a small stitch at every dot (or grid intersection), the stitches connect the dots (like running stitch).

The sample below was again stitched on a grid patterned fabric. I stitched two repeats vertically but only one horizontally, so the pattern is not very easy to see – it’s supposed to be chevrons. I should have started with a wider piece of fabric and stitched more horizontal repeats!

Italian smocking

Basketry at Morley with Stella Harding

For the past few weeks I’ve been back at Morley College on Tuesday evenings, attending a creative basketry course with Stella Harding. The focus of this course, though I didn’t know it when I signed up, was random weaving, so I’ve been able to build on the classes I did with Polly Pollock earlier this year.

Stella brought along lots of inspiring samples.

We started by making open and closed forms in cane without using moulds, which was new to me. We also had a go at dyeing cane.

Now we’ve been let loose on experimenting for ourselves, with different materials and forms – here are some of the pieces I’ve made.

This is a more complex form in cane. Apparently this style is known as a hen basket – I can just imagine a chicken sitting in there. 🙂

This was a random weave piece I made using dead fronds from some kind of palm in my back garden. I have no idea where it came from and have always thought it rather unattractive – but it’s great for basketry material!

And this is a piece that combines felt and paper yarn, inspired by a physalis (cape gooseberry).

Some of these samples are helping me work up ideas for a couple of exhibitions coming up next year – watch this space!

Marbling on paper and silk

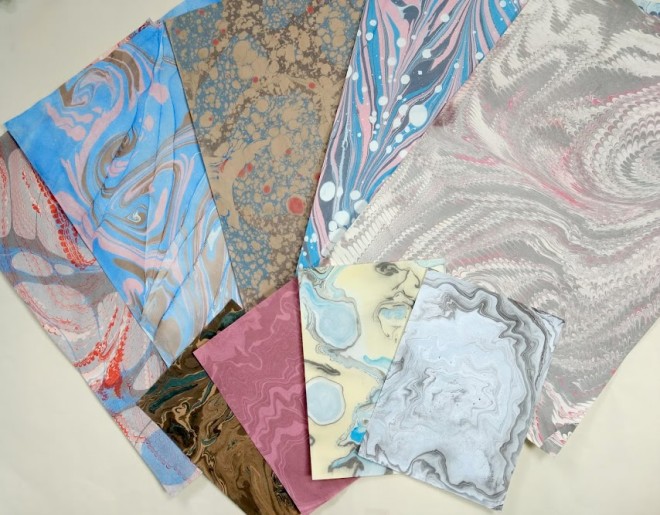
About four years ago I did an evening workshop on marbling paper. It was fun but the results were not fantastic. So I thought I’d give it another go on a three-day workshop at City Lit with Royston Haward.

marbled paper

We started by learning about the history of marbling and saw examples of different patterns.

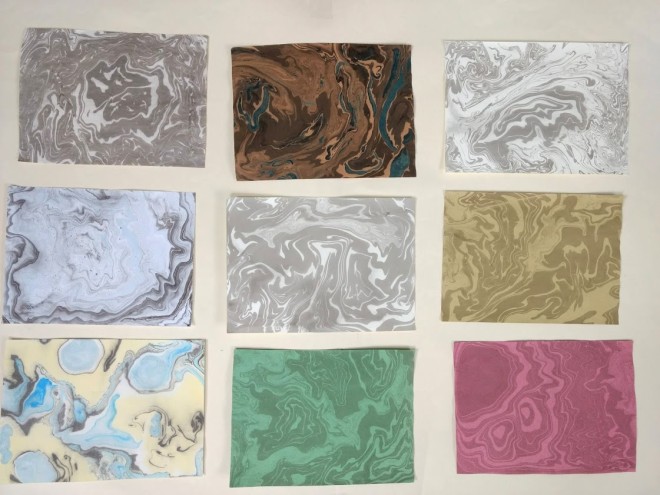
Then we started to get our hands dirty with suminagashi, a marbling technique used in Japan. This uses sumi calligraphy ink or other permanent inks, just floating on water, no size. These are some of the small samples I did.

suminagashi samples

We also tried it on rice paper.

suminagashi on rice paper

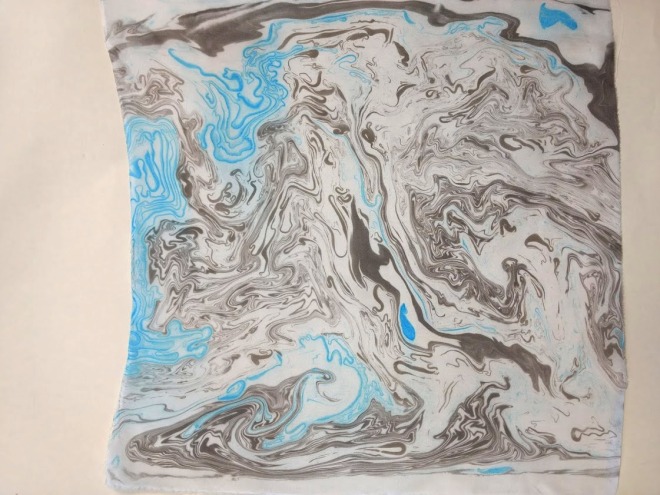
And I’d read that it works on silk too, so I took some unmordanted fine habotai silk in to try – it worked beautifully.

suminagashi on silk suminagashi on silk suminagashi on silk

Then we moved on to Western marbling. Unlike suminagashi, this mixes carrageen moss (a kind of seaweed) with the water to thicken it and support the colour. Patterns are created with toothpicks, combs or spatulas – sometimes a combination.

We tried with acrylics and gouache – most people seemed to get better results with gouache. The colour of the paper also affected the final result. Below are some combed patterns.

Below left is another combed pattern; on the right is a freeform pattern.

Below left is an antique straight pattern; right is a freeform pattern.

Below left is Spanish Moire pattern, made by rocking the paper as you place it on the size – close up it looks like folds of fabric. On the right is Italian pattern (nearly! – I should have added more wetting agent).

Below left is ghost marbling – one pattern marbled on top of another. On the right is a combed pattern.

I did have a go at marbling silk with gouache, but this came out very faint. It may have been better if I’d mordanted the silk first. (Paper for marbling requires mordanting with alum, unlike suminagashi.)

We also learnt how to make our own brushes and combs, as well as about polishing the paper afterwards, so it was a busy three days!

I have since washed the suminagashi silk and the pattern remains very clear. Could be another new product line? 😉

More on random weaving basketry

Sadly, the short course on random weaving basketry with Polly Pollock that I started four weeks ago at City Lit has come to an end. I loved every minute and think I’ve found a new obsession.

After the first basket made with cane, we moved on to working with paper yarn. Here are some samples made by Polly to inspire us.

First we dyed some of the yarn using Rit liquid dyes, which were new to me but are pretty simple to use – just add to water and vinegar, put in the yarn and leave until you’re happy with the colour, rinse and dry.

As before, we made a mould with rice, clingfilm and sticky tape, and created a base layer with some thicker paper yarn. Then we used the thinner dyed yarn to weave into the base layer, using soumak stitch – essentially looping it round a base strand – going in random directions.

You can build this up in the same or different colours. Here’s my piece in progress.

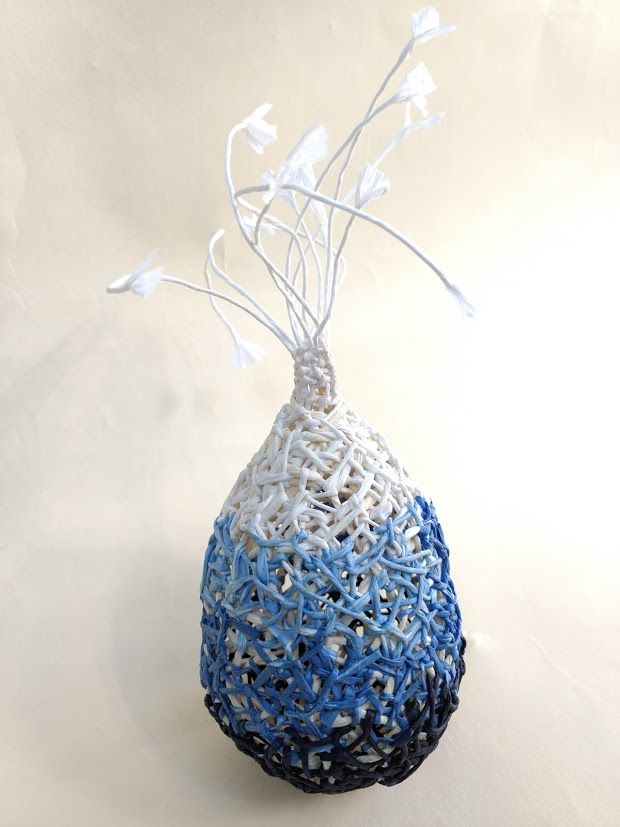
And here’s the finished piece. I didn’t leave the yarn in the Rit dye long enough to get a really dark blue, so I dyed some in indigo. 🙂

indigo paper vessel

I also started on a more ambitious piece but didn’t manage to finish it. Here’s a sneak preview of the beginning – watch this space for a progress report!

At the end of the class we had a display of all the work created over the four weeks – there were some really lovely pieces in paper, cane and wire, as well as some wrapped glass.


Spiral and Twistie with Pam de Groot

I realised at the weekend that I hadn’t written up the rest of the Pam de Groot online workshop on texture and dimensions.

For obvious reasons I’m not going to give details of how the Spiral and the Twistie were made. But I will say that I found both methods extremely innovative, and Pam is to be applauded for her ambition in trying to teach them through an online workshop.

Unlike face to face workshops, the tutor can’t advise during the making process that, for example, you need to lay out the fibre more finely. She can only judge from the finished piece, and Pam was very good at doing that.

Here’s my first Spiral, made using one colour. The curvaceous bottom led to it being named a Beyoncé spiral!

Then I had a go at a double ended version, with a colour change.

The final piece was the Twistie, and I had few problems with the structural support for this. I also probably laid out the fibre too thickly. Like the Spiral, it relies on a lot of shrinkage, so I might have another go at this on a smaller scale.


Texture and dimensions with Pam de Groot

Like buses, workshops seem to come along in groups. No sooner had I signed up to the course with Caroline Bartlett at Morley College than I heard that Australian felt artist Pam de Groot was running her first online workshop on textures and dimension.

I’ve long admired Pam’s sculptural felt, so I signed up immediately – and lucky I did, because it sold out within 24 hours.

The course runs over six weeks, with a new module every week containing written instructions, videos and downloadable PDFs. There’s also a discussion board where you can post photos of work in progress as well as finished pieces, ask questions and get feedback, and learn from other students too!

The first two modules featured the Splash,  representing the movement of water when something is dropped into it.

Image: Pam de Groot
Image: Pam de Groot

This was a great exercise in creating form through varying the thickness of the fibre, the direction of layout and the direction of rolling, and it was great to see the variety of colours and shapes that everyone produced. Here’s mine.

splash-final

As I finished this early in the second week, I decided to experiment with making a multi-layered Splash to resemble a flower.

I only had three felt balls left from the first one and didn’t want to make any more (I hate making felt balls!) so I used them to create three “stamens” in the centre of the flower.

multilayer-splash-1

Without the stamens it reminds me a bit of a protea flower. I’m already wondering if I can produce an artichoke, pine cone, chrysanthemum or thistle by varying the length and shape of the “petals” – very exciting!

multilayer-splash-2

Next up – the Spiral. 🙂

Pam’s next online workshop is in April – more information on her website.