May 2021 roundup

Apologies for the lateness of this post – as life starts reopening I suddenly seem to be very busy!

The big news this month is that I’ve managed to get to a real exhibition – the first one for months.

When I first started learning about the shibori technique, I read about a Japanese textile company called Nuno, which created innovative fabrics that often had shibori characteristics. So when Japan House in London announced the exhibition Making Nuno: Japanese Textile Innovation from Sudo Reiko, I booked up straight away.

japan house nuno 1

The exhibition is small but perfectly formed. A loom installation has the reels of thread set up to mimic one of the Nuno designs, and is beautifully lit to create striking shadows. Peering between the threads at the loom makes you feel as if you’ve just hit warp speed (ho ho).

japan house nuno 2

The exhibition focuses on three of Nuno’s innovative fabrics. Polyvinyl alcohol is a synthetic resin that shrinks at 60°C. It is screenprinted onto polyester taffeta in a grid pattern and then heated to produce the wriggly “Jellyfish” fabric.

japan house nuno 5japan house nuno 3

“Chemical lace” is made by stitching ribbon onto a water-soluble base, which is then dissolved to leave just the ribbon design.

japan house nuno 4

The third fabric laminates washi paper onto velvet, producing a rich contrast in textures. Sorry there’s no image of this – it was white on white and was difficult to get a good photo.

A series of films shows the production process of many other fabrics in different mills around Japan and is worth watching. Upstairs, a patchwork “curtain” showcases samples of even more fabrics.

japan house nuno 6

Making Nuno: Japanese Textile Innovation from Sudo Reiko runs at Japan House until 11 July.
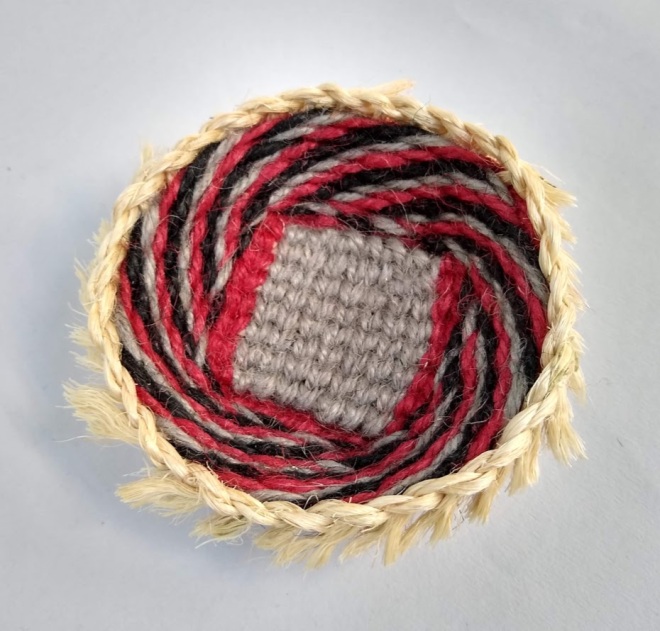
Twining and coiling

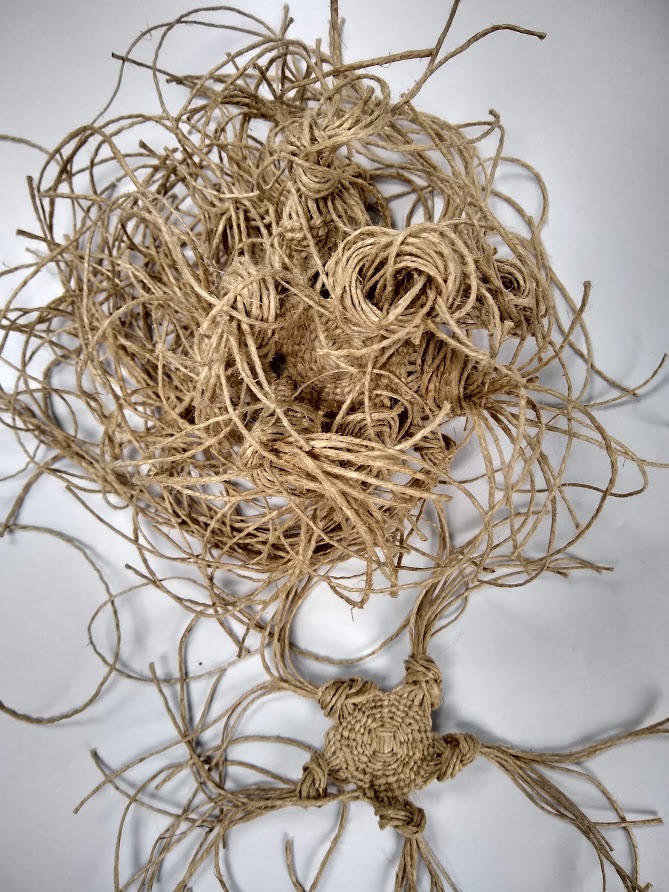
On the making front, I managed to finish my twined dodecahedron!

twined dodecahedron

I wasn’t sure whether to trim the ends further or leave them wild and woolly – Instagram opinion was fairly unanimous about leaving them wild. 🙂

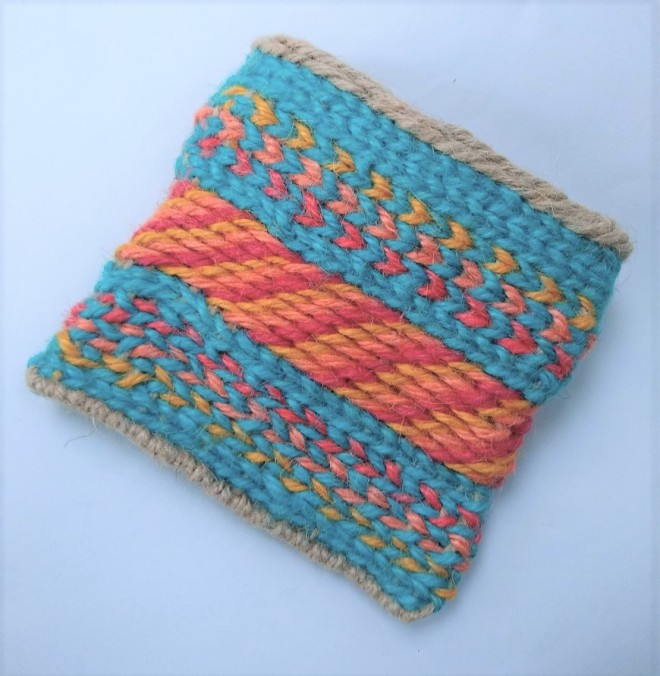
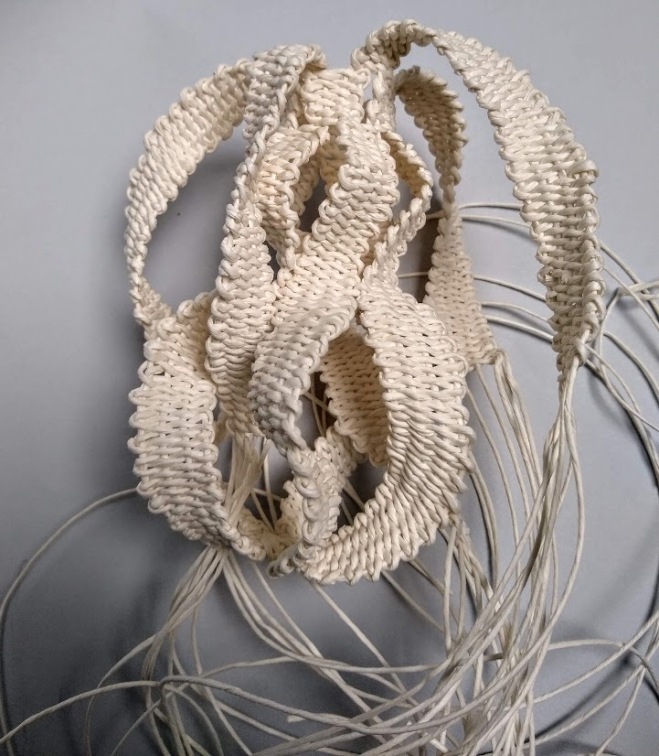
In class at City Lit we made some twined ladles with paper string.

twined ladles

The string I used for the first one (on the left) was a bit bulky, so I made another one (on the right) that was much better.

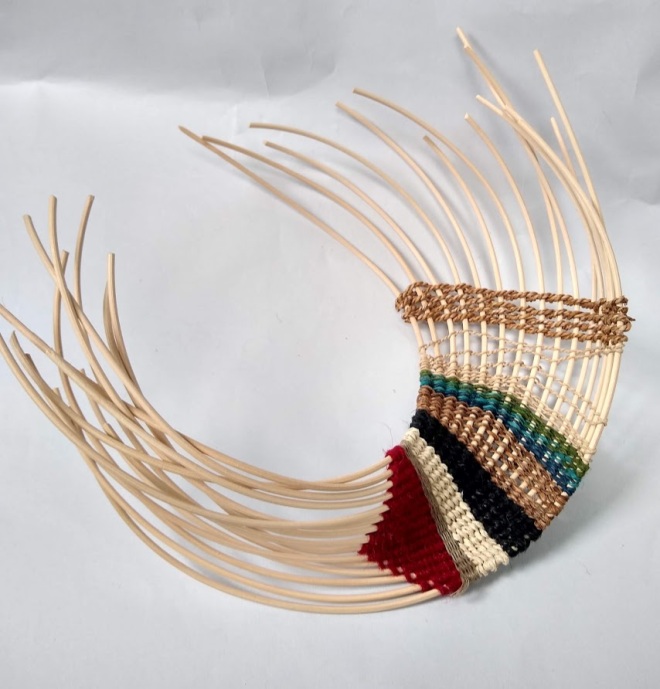
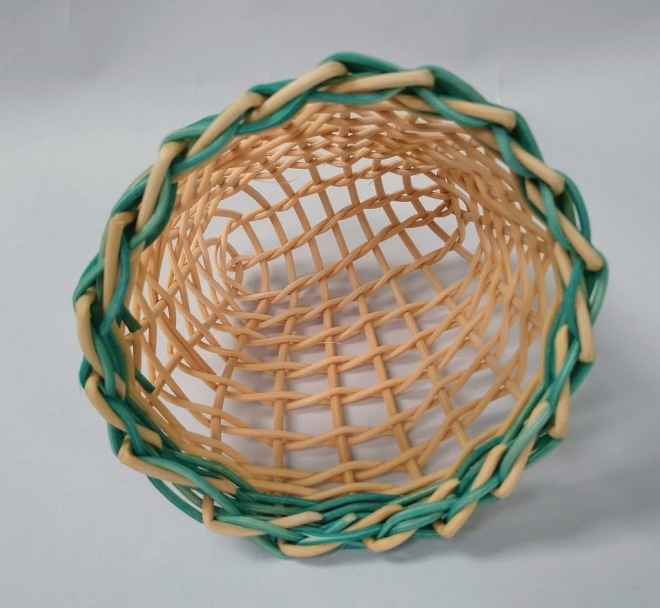
I also had a go at starting twining with an overlapping base, which was a bit fiddly but worked OK in the end.

twined overlapping base 2twined overlapping base

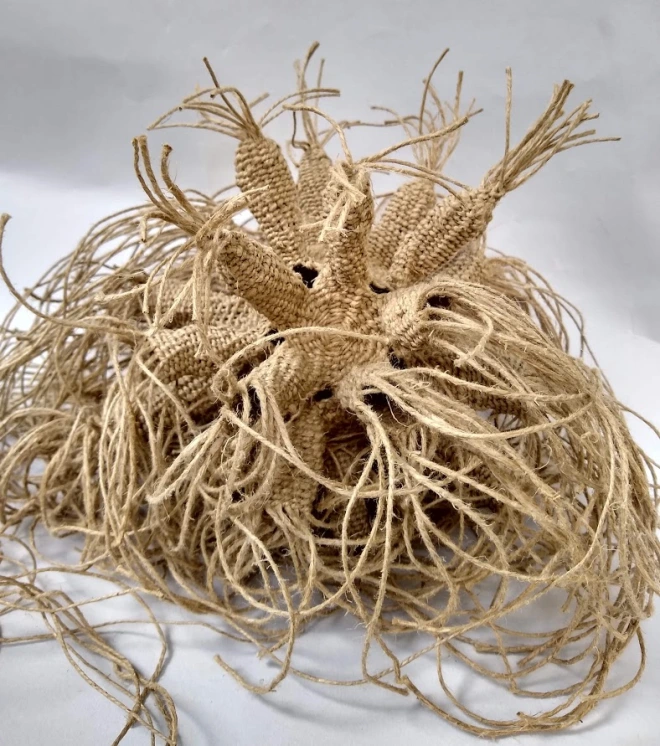
I also experimented with coiling, trying out a technique described in Annals of the South African Museum, a book owned by my tutor Polly Pollock. This technique, which incorporates ribs in the coiling, was used on bee skep in South Africa.

First of all I tried making a flat sample with rigid ribs (cane) and a bundle of dried unknown vegetation as the core, wrapped with very fine chair cane.

bee skep coiling

Then I tried it in the round using softer materials (polished flax for the ribs and core, and hemp for wrapping). This was much easier.

bee skep coiling soft

Finally, the first issue of the Basketmakers’ Association Newsletter that I edited was published this month. It was hard work for me and the volunteer designer Anita, but we’ve had extremely positive feedback, so it’s good to know that our efforts are appreciated!

ba newsletter may 2021

April 2021 roundup

It definitely feels as if spring has sprung. The weather has turned (for now), the garden is a riot of green, and I’m back at college. There does seem to be a sense of hope and renewal in the air – let’s hope it lasts!

Our first sessions back at City Lit are focusing on twining with John Page. We started off using sisal and jute, getting a feel for tension, increasing and decreasing the width, and use of colour.

twining with sisal and jute

We also looked at an alternative start, the square start, which results in a double-layered base, which can be two different colours. I combined this with waling in three colours, ending up with a bowl where the inside is completely different from the outside.

square start basket inside square start basket outside

I also had a go at making a bowl in my signature pattern from discarded telephone wire, begged from phone engineers whenever I pass a junction box.

bowl made from telephone wire

We then moved on to making pouches, where we learned about the tendency for flat pieces to twist, and the importance of using reverse twining to help counter this. It produces a chevron pattern, which adds extra interest.

twined pouch

I also attempted to make a ribbed pouch, by using alternating thick and thin stakes and thick and thin weavers. My hope was that the thin weaver in front of the thin stakes would recede, while the thick weaver in front of the thick stakes would protrude, giving a ribbed effect.

However, this didn’t work out, partly because the last stake on one side is the same thickness as the first stake on the other side, so while the thin weaver will be in front of the thin stake on one side, it will be in front of the thick weaver on the other side! It’s not very obvious from the photos, so you’ll have to take my word for it. However, it does give the stakes more prominence in the overall pattern.

Thin weaver in front of thin stakes
Thin weaver in front of thick stakes

So far we had worked with soft materials. For homework we were asked to make a sample of twining materials on rigid stakes. Nobody said it had to be flat and straight. 😉

I had some cane that was coiled up, so it was curved. I cut out a series of C shapes and twined them together roughly in the centre. I decided not to use reverse twining to see if I could get the piece to twist. And it worked!

Time to try some openwork twining. One of the handouts we were given had various diagrams showing different types of staggered twining, including one over a double warp (“staggered weft twining over double transposed warp” was the actual description). Nothing like jumping in at the deep end, so I had a go.

First I tried a flat piece, which worked fine – once I remembered to keep the warps in the same layers and not to cross warp threads of the same colour.

Then I tried a piece in the round, but I couldn’t get the pattern to work continuously. You can’t see it in the photo below, but the pattern along the edge where the rounds joined is a complete mess. It wasn’t until I gave up and looked more closely that I realised that I needed an odd number of each colour of warp threads – d’oh! When I pulled out one of each thread the pattern did indeed work – though I then had too many twined threads.

So I had another go, this time with odd numbers of warp threads – and it worked. I finished off by twining around the warps from both sides at the bottom to create a pouch. Apologies for the photo – it’s tricky to shoot a two-sided see-through object.

And after all this, I’ve also made progress on the twined Work in Progress I showed you last month. Hopefully by next month it will be finished!

March 2021 roundup

The big news this month is…drumroll…I have finished the Tetrapak dog!

tetrapak dog 4tetrapak dog 5

Any suggestions of what to call him or her? 🙂

I also tried a variation on a theme, making a circular coiled pot with a lid based on my previous tortoise vessels. Because the peaks resemble limpet shells, I’ve called this a limpet pot.

limpet pot 1limpet pot 2limpet pot 3

Another construction I’ve been involved in was a bike shed in the front garden. This was not particularly creative – I just mention it because it took a lot of time and effort this month! The very heavy shed arrived in bits and had to be pieced together on a concrete base that we had previously laid.

Much huffing, puffing, and swearing ensued, not to mention a couple of broken drill bits. I also ended up falling into wet concrete at one point – and the local wildlife were determined to leave their marks too!

But now the shed is up, and I am able to get into the house without squeezing past a couple of bikes and associated paraphernalia. We just need to plant a fast-growing shrub to cover up the unattractive exterior.

bike shed

With restrictions on lockdown slowly lifting, our two-year basketry course at City Lit is due to resume in mid-April, more than a year since it stopped. I’m really looking forward to being back in the classroom, especially now that I’ve had my first coronavirus vaccination.

We are going to be starting on twining, so I thought I might try to get ahead a bit and started on a new experiment. This is very much a Work In Progress! 😉

twined wip

Hopefully this will be more presentable next month.

In the meantime, I wish you all a happy Easter.

Twisting and interlocking

My fascination with Möbius strips continues. Although the first triple-twist loop I made was rather small, I have a friend with very slim wrists, so it proved to be the perfect birthday gift!

I then went on to make a slightly larger version, this time wrapping with paper yarn, which produced a much stiffer piece than wrapping with wool.

triple mobius loop

Some of the yarn I dyed with indigo and onion skins.

triple mobius loop

What next? Obviously it was time to try interlocking Möbius strips (but with only one twist in each!). 😉

I did a paper mock up of how this might look.

interlocking paper mobius strips

Then I set to work. Previously I had used both wire and paper yarn as the core, but I now decided to try using wire on its own.

interlocking mobius wip

However, without the paper yarn, the wire on its own provided less grip for the wrapping, which tended to slip more. The piece also had less body. So I went back to including paper yarn in the core.

interlocking mobius wip

I also found that the initial slippier core meant that the parts of the strips that were supposed to be flat started to curl over at the edges. (This was probably also caused by too much tension when wrapping on my part.) Although this was not intentional, I actually liked the increased movement caused by the curling, so I didn’t try to correct it.

interlocking mobius

As a result, the final piece of interlocking Mobius strips doesn’t look anything like the paper mock up! But I’m OK with that.

interlocking mobius strips

And now for something completely different – well, almost

A couple of months ago I signed up for an online course with Australian basketmaker Catriona Pollard. The course was on making sculptural basketry with found wood, as I was really interested in finding out how to incorporate found objects such as wood into my work.

However, finding suitable pieces of wood was a bit tricky in the middle of London in August. There were alternatives I considered, but in the end I just started on the sculptural part, which involves twining.

I soon found out that twining with paper yarn produces a satisfying (for me) twist. So I’ve decided to go ahead without the wood for now and see what happens.

sculptural twining

I have no plan for this – I just decided to start with five “arms”, like a starfish, and see how it developed. Sometimes they come together, sometimes they wind over or under each other, depending on how I feel. At the moment it’s fairly symmetrical, though it may not look like that in the photo.

Although twining is a different technique from coiling, I’m enjoying exploring how to achieve similar twisting and interlocking effects. Let’s see how it goes!

Tiny open weave twined baskets

As a break from precise geometric work, I was aching to have a go at something a little less rigid. Then I saw that Christi York, whom I follow on Instagram, had produced some videos on making open weave baskets.

Her baskets were made from peeled, split ivy (she’s also produced videos showing how to do this). However, I had a go at this but totally failed to split the ivy evenly. (I’ve had similar problems with trying to split willow.)

So I thought I would use some cane leftover from making my cane platter. I’m afraid I didn’t take any photos as I went along not enough hands! 😉  Here’s the result – it’s about 10cm (4 inches) high.

cane garlic basket cane garlic basket

I decided to add a handle on one side so it could be hung up – maybe for keys or a couple of bulbs of garlic.

cane garlic basket

As Christi says in the videos, cane is very regular, which makes it easy to use. So I decided to make another one with more irregular material – cordyalis cordyline leaves.

cordyalis leaves

I have a cordyalis cordyline plant in the back garden – I’m not sure where it came from, as it wasn’t there when we moved in and I’m pretty sure I didn’t plant it! But its leaves are very strong for basketry. They fall off naturally, but sometimes I remove them from the trunk when they have gone brown. I soak them for about an hour in warm water and then wrap them in a towel to mellow overnight.

Here’s the cordyalis cordyline version.

cordyalis garlic basket cordyalis garlic basket

This is even smaller than the cane basket – about 7cm (3 inches) high and 6cm (2.5 inches) across. I used the same number of stakes (9) for each.

Here you can see them together.

two garlic baskets

It was very relaxing to make something more freeform – it was also relatively quick!

Edited to say: Got the name of the plant wrong – should be cordyline, not cordyalis. Goodness knows where that even came from!