Lumps and bumps

Thanks to all of you who commented on my last post, suggesting I should cut away more felt from the flint. So I did – and you were right, the balance of felt to stone is much better. 🙂

Wrapping rocks can get quite addictive if you let it – I also enclosed a bit of coral.

coral and felt

This week we’ve been working on lumps and bumps with Pam de Groot, essentially based on the principle that the thicker the felt, the less it shrinks.

Here’s a piece I made inspired by the Phyllidia exquisita sea slug, or nudibranch.

felt inspired by Phyllidia exquisita nudibranch

And here’s something that resembles a funny-coloured garlic clove when it’s closed, but opens up to reveal its balls in the centre. 😉

Spiral and Twistie with Pam de Groot

I realised at the weekend that I hadn’t written up the rest of the Pam de Groot online workshop on texture and dimensions.

For obvious reasons I’m not going to give details of how the Spiral and the Twistie were made. But I will say that I found both methods extremely innovative, and Pam is to be applauded for her ambition in trying to teach them through an online workshop.

Unlike face to face workshops, the tutor can’t advise during the making process that, for example, you need to lay out the fibre more finely. She can only judge from the finished piece, and Pam was very good at doing that.

Here’s my first Spiral, made using one colour. The curvaceous bottom led to it being named a Beyoncé spiral!

Then I had a go at a double ended version, with a colour change.

The final piece was the Twistie, and I had few problems with the structural support for this. I also probably laid out the fibre too thickly. Like the Spiral, it relies on a lot of shrinkage, so I might have another go at this on a smaller scale.


Texture and dimensions with Pam de Groot

Like buses, workshops seem to come along in groups. No sooner had I signed up to the course with Caroline Bartlett at Morley College than I heard that Australian felt artist Pam de Groot was running her first online workshop on textures and dimension.

I’ve long admired Pam’s sculptural felt, so I signed up immediately – and lucky I did, because it sold out within 24 hours.

The course runs over six weeks, with a new module every week containing written instructions, videos and downloadable PDFs. There’s also a discussion board where you can post photos of work in progress as well as finished pieces, ask questions and get feedback, and learn from other students too!

The first two modules featured the Splash,  representing the movement of water when something is dropped into it.

Image: Pam de Groot
Image: Pam de Groot

This was a great exercise in creating form through varying the thickness of the fibre, the direction of layout and the direction of rolling, and it was great to see the variety of colours and shapes that everyone produced. Here’s mine.

splash-final

As I finished this early in the second week, I decided to experiment with making a multi-layered Splash to resemble a flower.

I only had three felt balls left from the first one and didn’t want to make any more (I hate making felt balls!) so I used them to create three “stamens” in the centre of the flower.

multilayer-splash-1

Without the stamens it reminds me a bit of a protea flower. I’m already wondering if I can produce an artichoke, pine cone, chrysanthemum or thistle by varying the length and shape of the “petals” – very exciting!

multilayer-splash-2

Next up – the Spiral. 🙂

Pam’s next online workshop is in April – more information on her website.

Seashells revisited

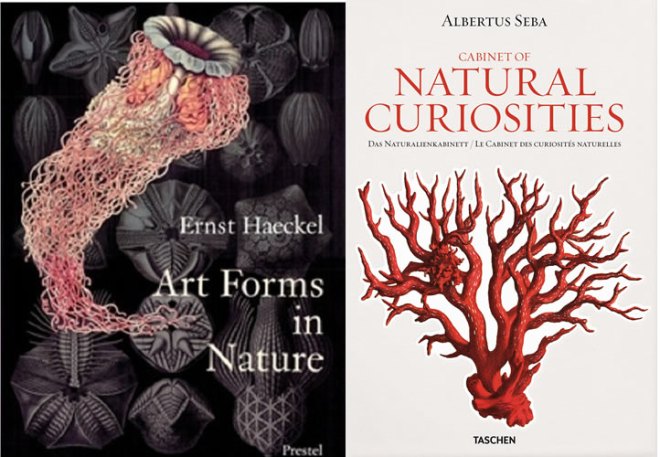
Two of my favourite books are Art Forms in Nature: Prints of Ernst Haeckel and Albertus Seba: Cabinet of Natural Curiosities.

haeckel and seba

I could spend hours leafing through the intricately precise illustrations of natural specimens, marvelling at the wonderful natural geometry. They are a fantastic source of inspiration.

haeckel2seba2

Earlier this week I was looking at the plates of shells in the Seba book and was reminded of my last attempt to make felt shells. Three years later, with much more felting experience under my belt, I had a eureka moment about another way to tackle this.

My first attempt didn’t go too badly, but the proportions weren’t quite right.

felt shell

So I extended the resist at one end, and also added some silk decoration on the outside.

felt shells

You can’t hear the sea when you hold it to your ear, but the view inside is rather lovely. 🙂

felt shell interior

Felting samples

After thinking about it, I realise that my vague dissatisfaction with the hard and soft pieces I’ve made so far is probably due to the lack textural contrasts. Although the stones are hard and the wool is soft(ish), both have a very smooth texture, so the contrast isn’t as great as you might expect. Adding embroidery adds texture as well as colour.

So I decided to try using slate paddlestones, which have more ridges – this is the result.

paddlestone ring

This piece is very patchy – I took it apart and remade it several times while trying to refine the process! But I’m very happy with the overall effect.

I also revisited briefly my work on cellular felt. Unfortunately I completely cocked this up. 😦 There should have been 12 “cells” of each colour, but I miscounted the number of cells in the middle peacock blue layer, so there are only 11. As a result, the cells on each row don’t alternate properly all the way round.

half pompom

I think I could add another layer in the centre to form a dahlia-like structure – though I need to solve the  problem of how to get the middle layers to felt properly. But again, the sample was a good way of working through the process and refining solutions. I think this could work well on a larger scale as a wall piece.

Hard and soft

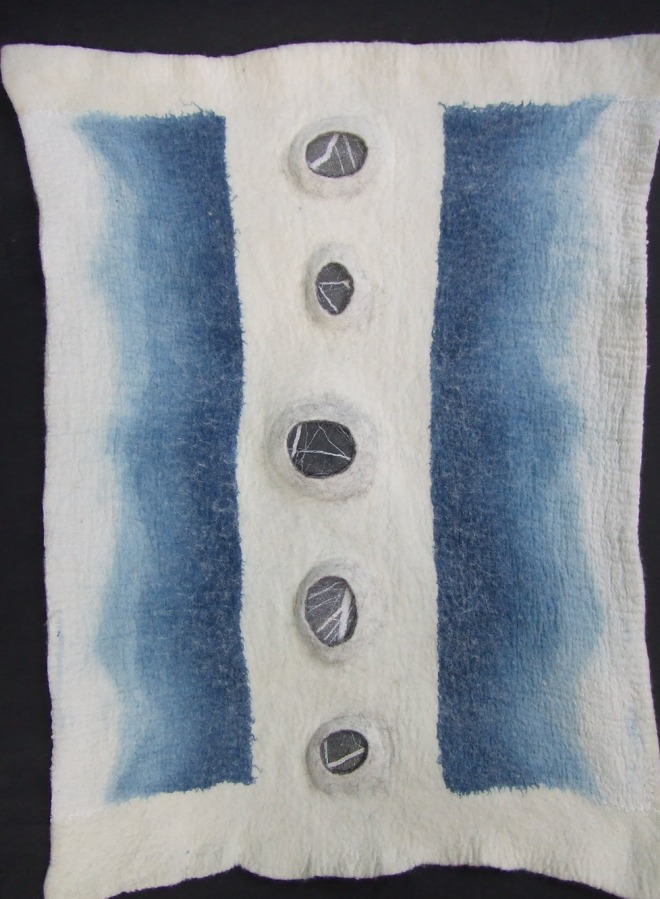
A few months ago I made a felt wall hanging using ombre-dyed indigo muslin and some pebbles I found on an Italian beach.

blue stones 1 blue stones 2

I thought I would experiment further with combining hard and soft in this way, this time in 3D form, using smaller pebbles I found on Welsh beaches.

This is a ball I made. I was quite pleased with the finished version on a technical level, but felt that it lacked something.

hard soft 5

Then I remembered a very early felt piece I made at Morley College, when I was experimenting with using marbles as a resist.

embroidered crater flask

So I decided to add some simple embroidery to jazz it up a bit.

hard soft 1 hard soft 2

That was better, but I wonder if I should have used more than one colour.

Then I tried a more abstract shape in my usual colour palette.

hard soft 4 hard soft 3

I’m not sure whether to add embroidery to this as well, and if so what colour. What do you think?

Pods workshop with Andrea Graham

I’m just back from another fabulous three-day workshop at Atelier Fiberfusing near Amsterdam in the Netherlands. The atelier is run by Dorie van Dijk and her family, and I attended a workshop by Lisa Klakulak there last year. It’s a fantastic space, with a huge table for each student and plenty of room to move about. Food is plentiful and delicious, sometimes unusual – I’ve never had sauerkraut lasagne before! 🙂 – and though the atmosphere is warm, friendly and laid back, underneath everything is extremely well organised. I can’t recommend it highly enough.

My chosen workshop this year was with Andrea Graham, who makes beautiful sculptural felt. I’ve admired her work for a long time and at one stage wondered about doing a workshop by webcam. But then I saw she was coming to Atelier Fiberfusing, and that was all the excuse I needed!

I’d booked for the three-day workshop on making pods, but before I arrived, there had been two previous workshops on making jewellery and textured surfaces. The results looked really interesting.

pod jewellery pod texture

Andrea had brought along some examples of pods to inspire us.

pod andrea2 pod andrea3

We started by making the core and legs for our pods, then added features such as spikes and resists using needle felting. After covering with the base colour and adding more features we finally wet felted the whole piece.

With 14 students in the class, all experienced felters, the results were incredibly varied, as the photos below show! The first one is mine.

Andrea is a very good tutor. Because of her experience, she can point out where the trouble spots are likely to be in advance, hopefully preventing too much disappointment after a lot of hard work!

I learnt a lot on this workshop:

  • Having done very little needle felting, I now have more respect for what can be achieved with this technique. Not just through what we did in class, but because Ruth Packham, who was staying at the same hotel as me, is an avid needle felter and gave me some inspiration. I still prefer the texture of wet felting though. 🙂
  • I’ve never made spikes before – I equated them with making bag handles, which is a long and tedious process if you just use bubble wrap. But using a bamboo mat is infinitely quicker, as long as the mat is sturdy enough.
  • I’ve never felted with batts, but they are much quicker to lay out. The short fibre merino I got from New England Felting Supply was much admired for the gorgeous mix of colours, and it felted like a dream! However, being used to laying out felt as “shingles” using tops, I had some difficulty in judging how thick the final felt would be when using batts, so some of the prefelt I made was quite thin. Hopefully this will improve with experience.

And of course I made some lovely new friends! 🙂

group shot pods

Looking forward to next year already…