Alien pod update

Last week I wrote about my first unsuccessful attempt to make some nested felt vessels, aka the alien pod project. 🙂

Well, I had a second unsuccessful attempt at the weekend. I altered the shape of the resist to make the area where the two halves joined narrower, and after cutting the felt to remove the resist I turned over the thinner layers of felt and stitched them to try to create a firmer lip. But in doing so I inadvertently made the bottom of the resist slightly wider. The result is that the alien looked as if it was in a bathtub rather than a spaceship! 🙂

alien pod1

I decided from this that my fantasy of having a completely smooth join was unlikely to happen, as once you cut the pod in half, each half will shrink slightly differently and they will never join up “seamlessly” anyway.

So this week I tried using separate resists for the top and the bottom, making the bottom slightly narrower so that the top can slide over it easily.

The alien now sits in a much more tailored pod.

alien pod3alien pod2

Just have to decide now how many layers to make!

Felting with (live?) barnacles

How long can barnacles live out of water? The answer, I fear, may be longer than you think. More on this in a minute.

While I was at the pods workshop with Andrea Graham, I managed to finish one pod and start another. However, due to the pressures of work since I got back, I’ve only just got round to completing this second one.

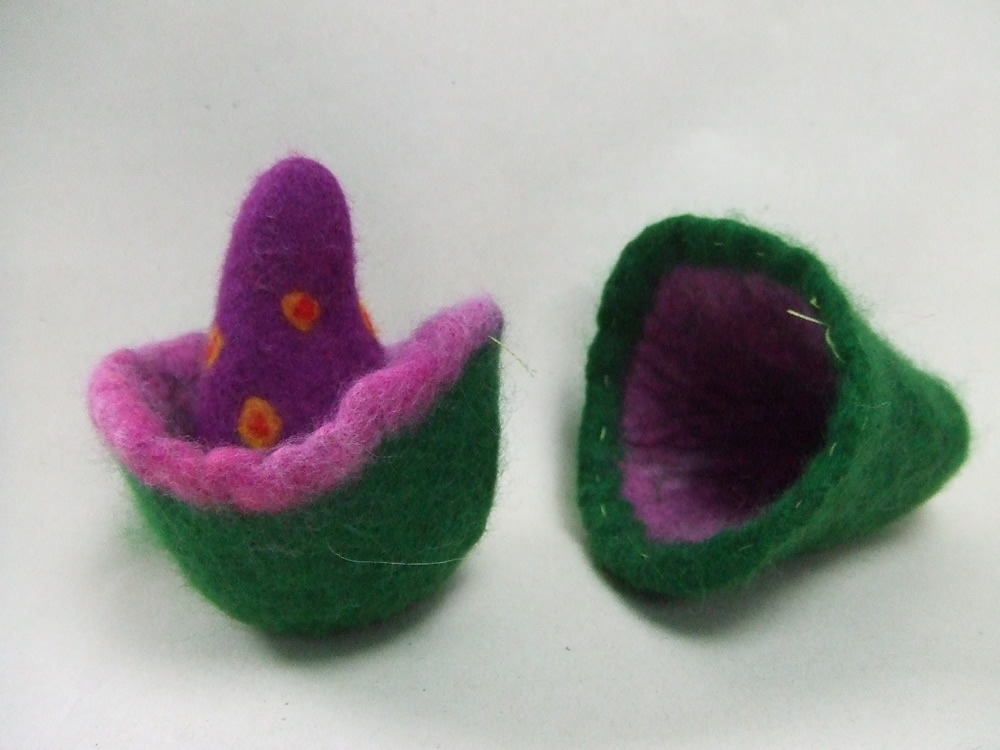
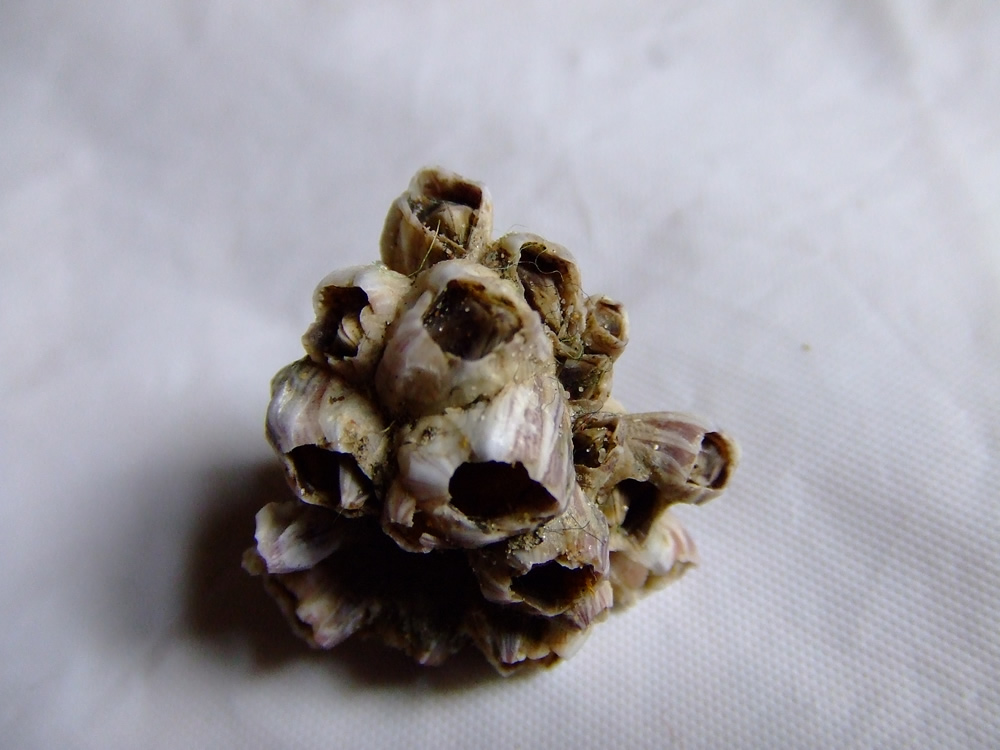
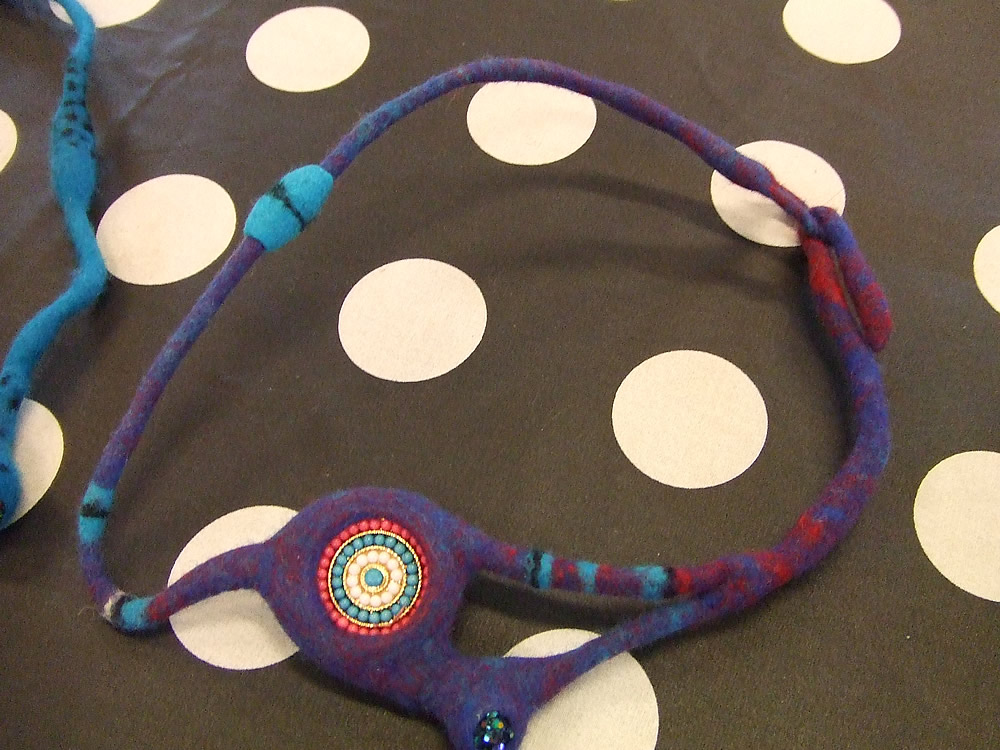
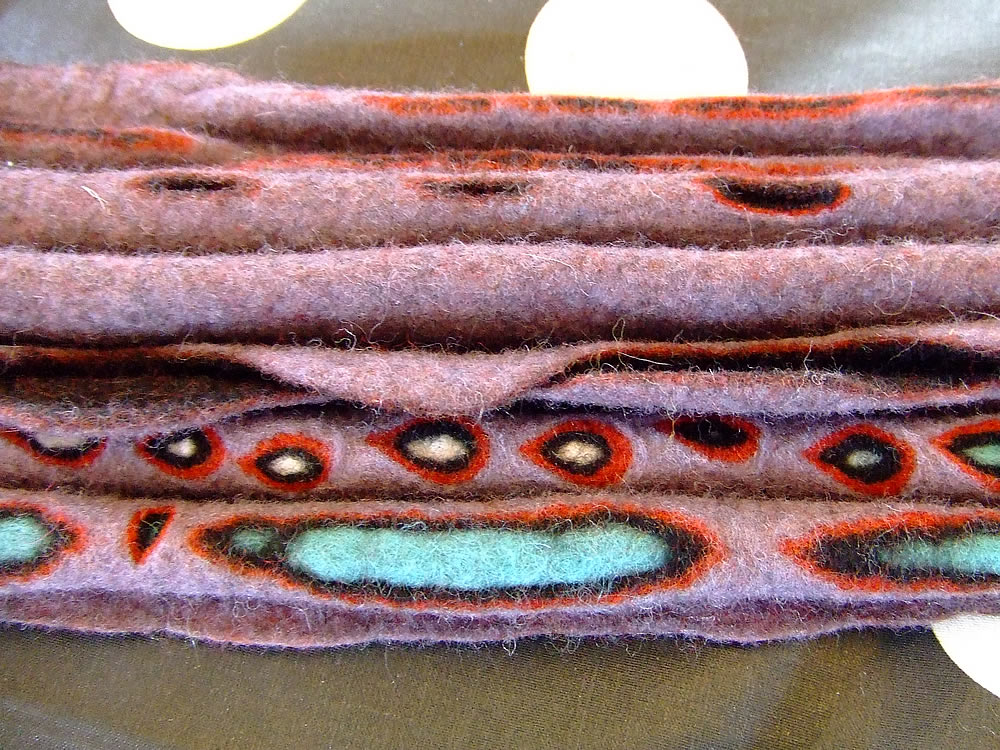
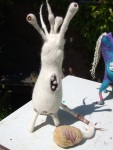
This pod was intended to be another sample, trying to incorporate or improve some of the techniques I’d learned. One of these was embedding an object like a bead or a marble. I decided to try using a cluster of barnacle shells I’d found on a beach several years ago. (You can see where this is going!)

I don’t know exactly how long I’ve had this barnacle cluster, but it’s definitely a few years. I’m a city girl through and through, but when I’m on the coast I do love beachcombing, gathering shells, pebbles and other items that ESP regards as luggage-loading detritus. The barnacles have been sitting in a glass jar along with a random collection of other shells and bits of dead coral, waiting for the right project to come along. And this time I thought it had.

The shells looked perfectly innocuous, so I placed the cluster on top of my pod, put a plastic resist on top, and enclosed it in a nice coat of merino.

barnacles pod1

Then I wet felted it.

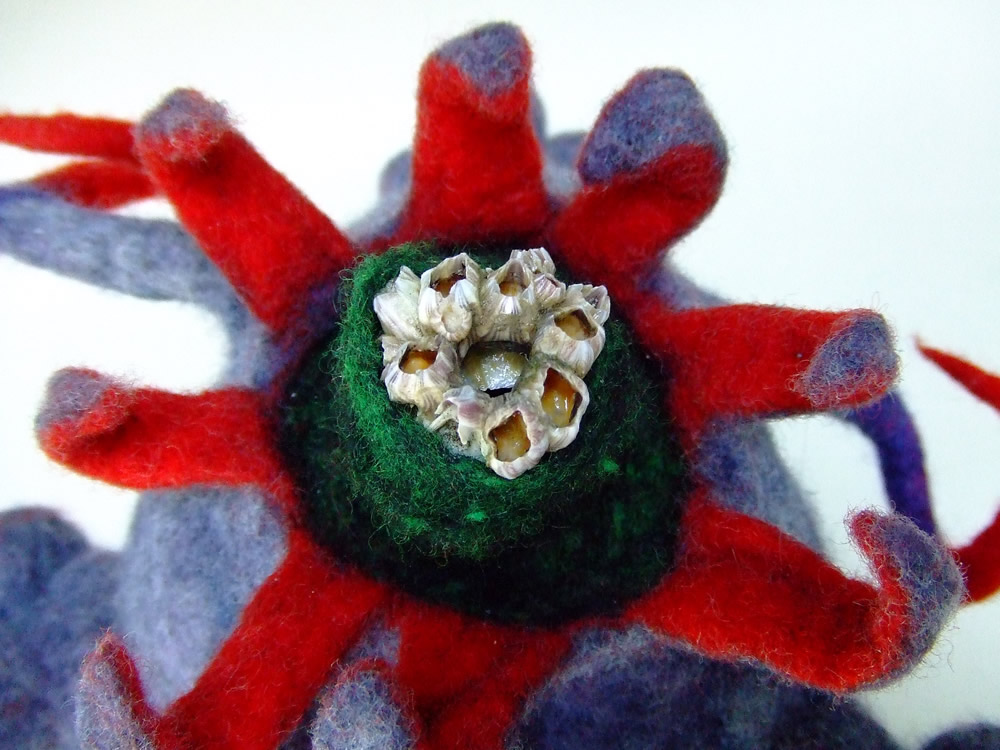
When I opened up the resist, the cluster looked different. Some of the shell plates inside the craters, which had been firmly shut when dry, now looked partly open. And there was a bit of a whiff of the sea.

barnacles pod2

There was nothing for it but to remove the cluster and extract what remained of the barnacles from their shells (I have to say that a felting needle is very good for this!). Then, after thoroughly disinfecting the rest (along with the felting needle!) I eased the cluster gently back in.

[Short digression here – please ignore if you are not interested in barnacle anatomy!]

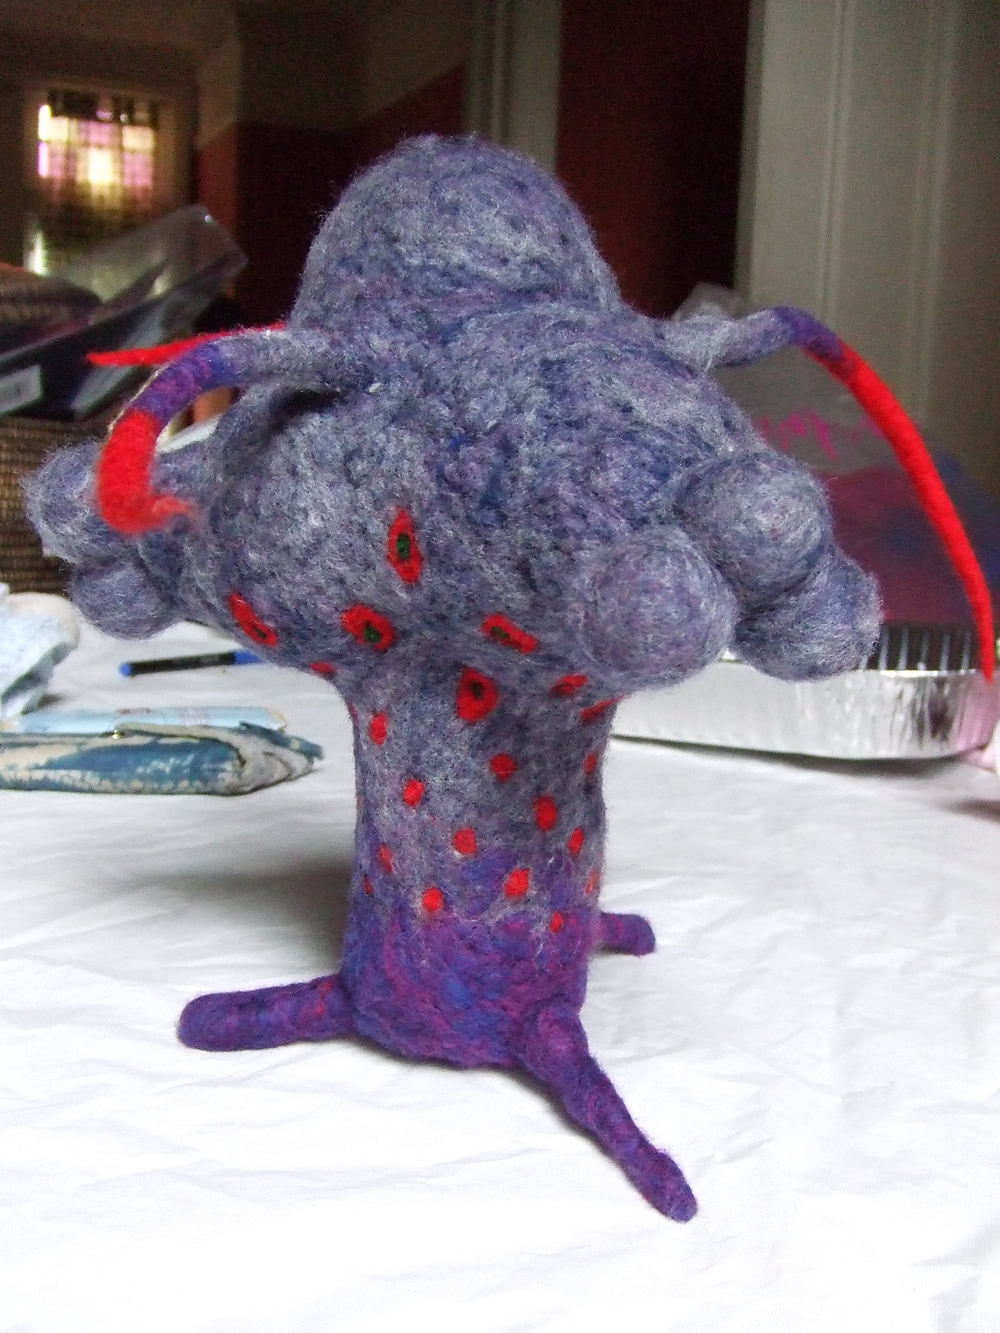
I had assumed that barnacles were molluscs, but actually they are crustaceans. The diagram below shows how it resembles a shrimp lying on its back, with leg-like appendages that the barnacle uses to absorb oxygen and waft plankton into the mouth.

acorn barnacle

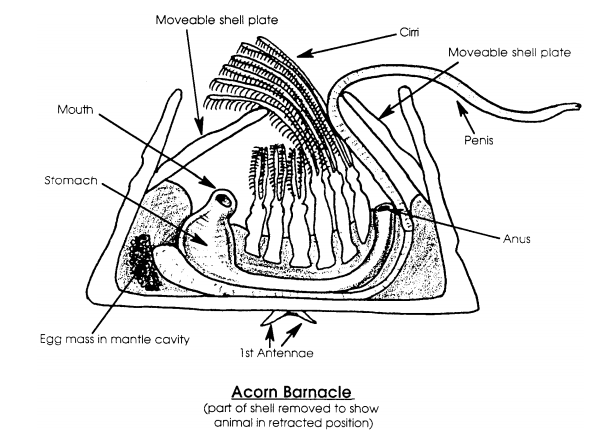
It also has a pretty long penis!

Ahem. As to the question of how long barnacles can live outside water, I could find no definitive answer. This article claims that one species can live for three years “with only brief submergence one or two days a month” – which my barnacles never received.

I only hope that the creatures were dead and that the opening of the shell plate in response to water was just a reflex action.

[/end digression]

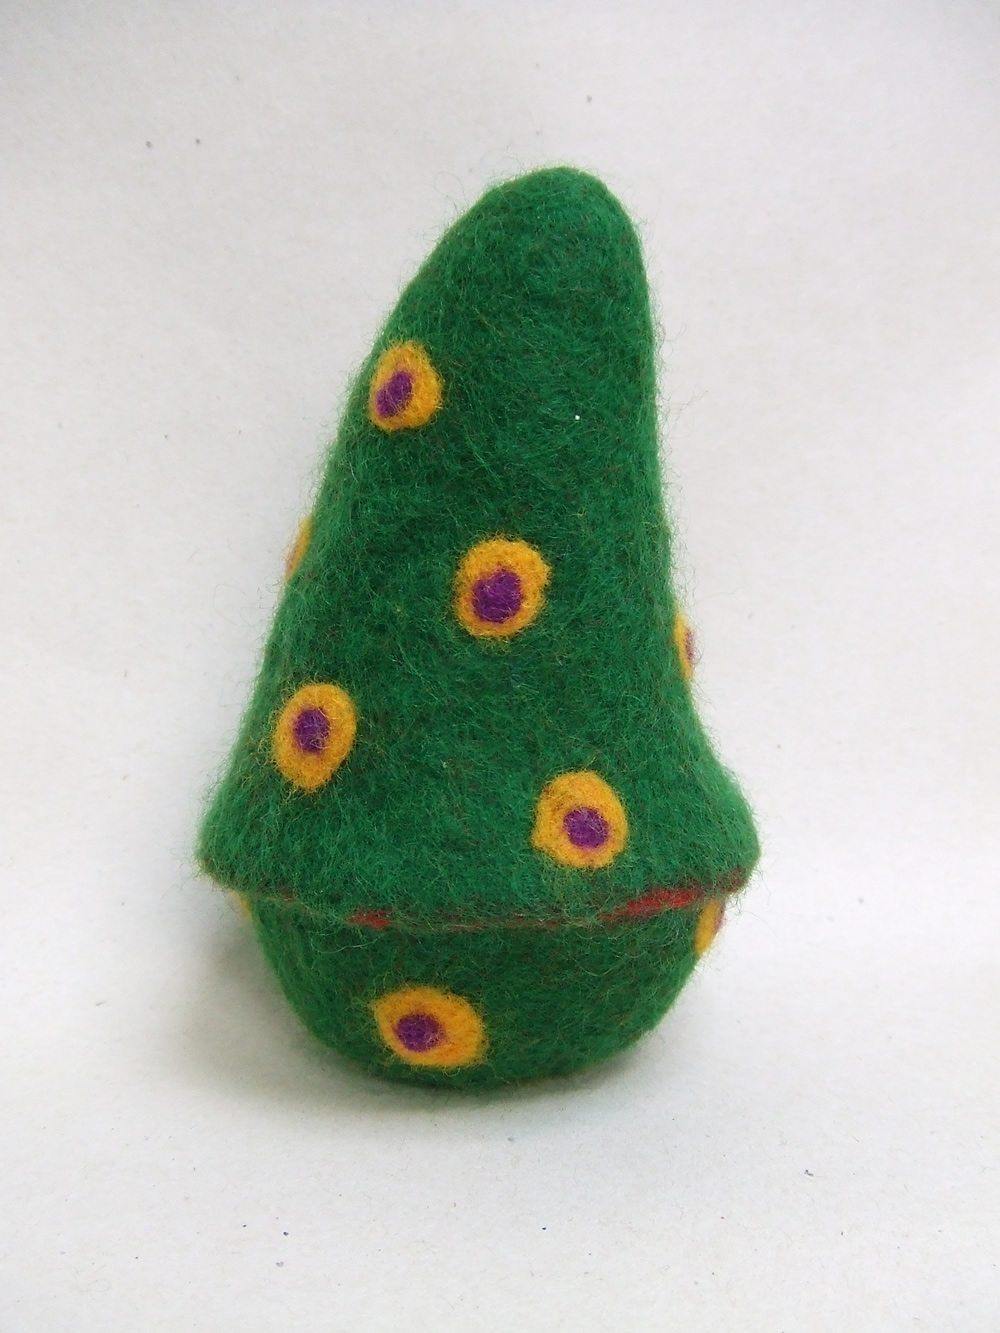
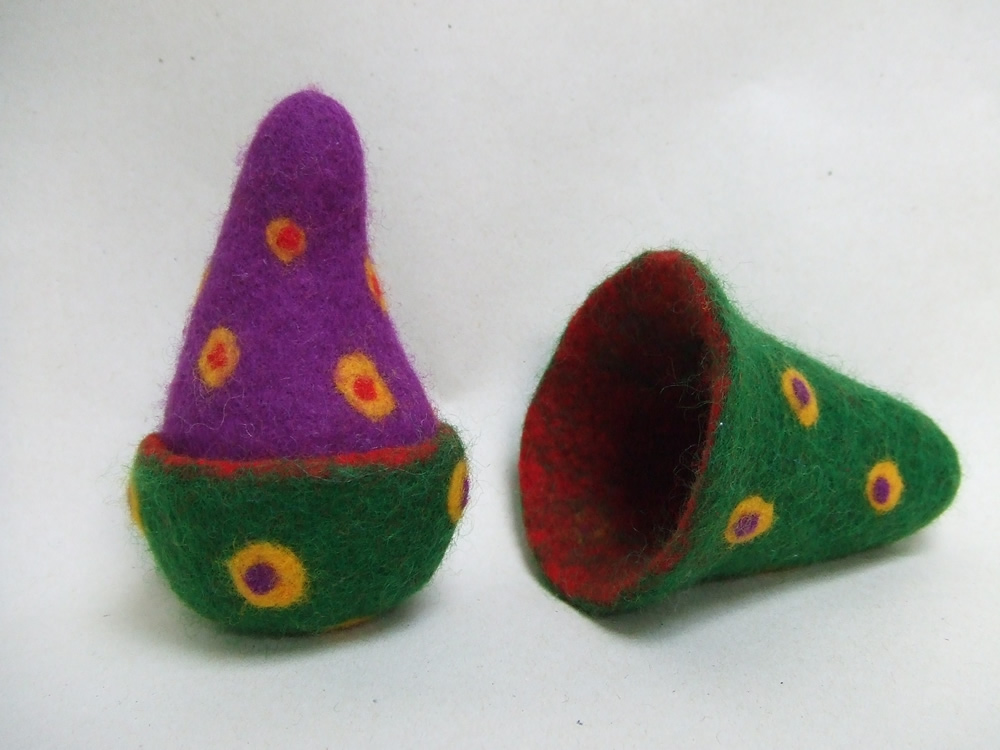
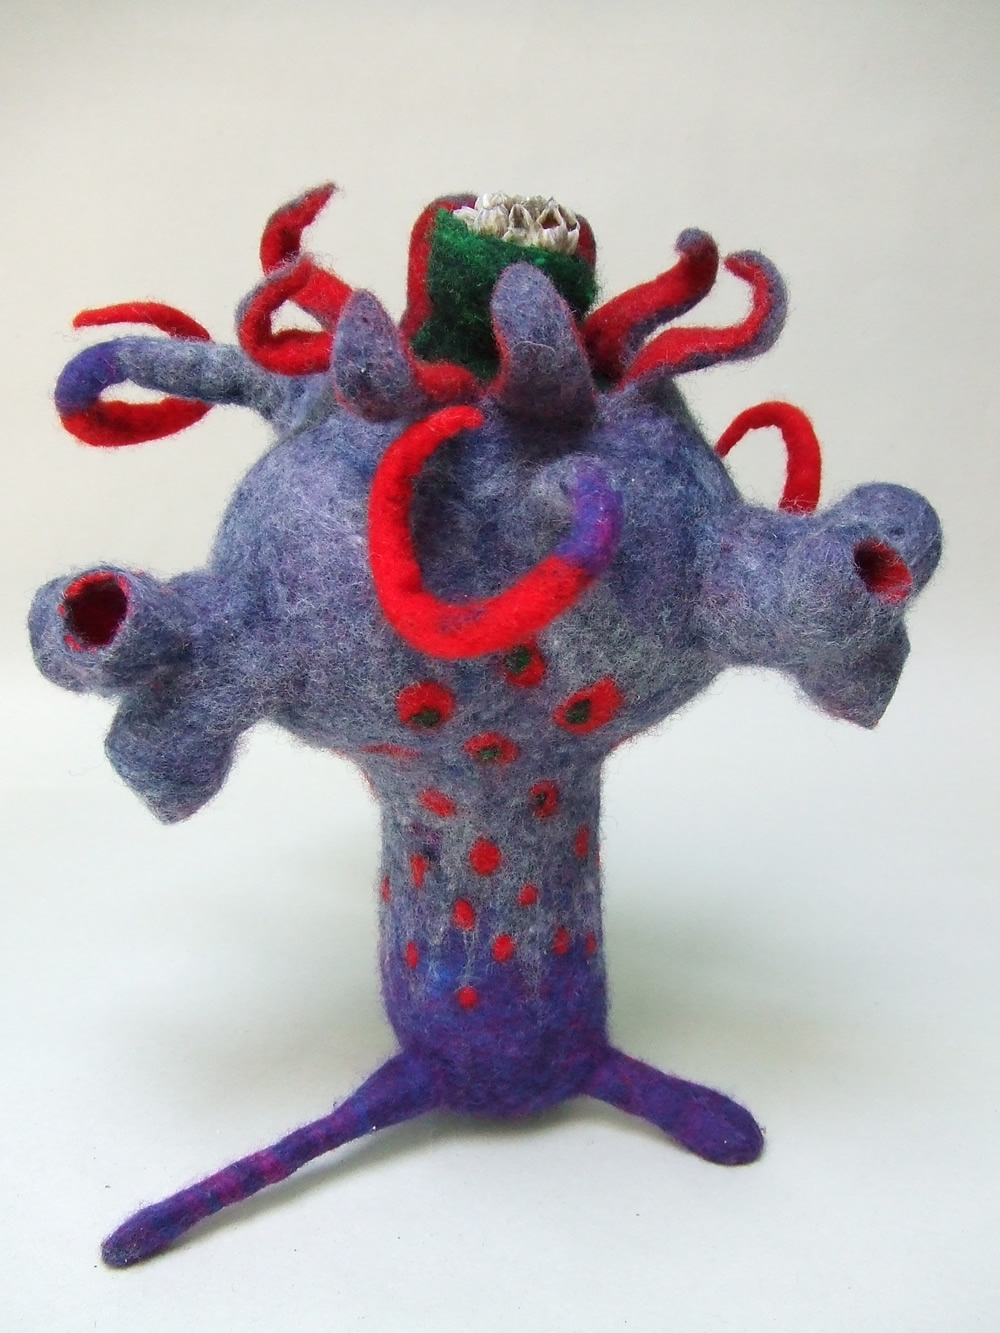
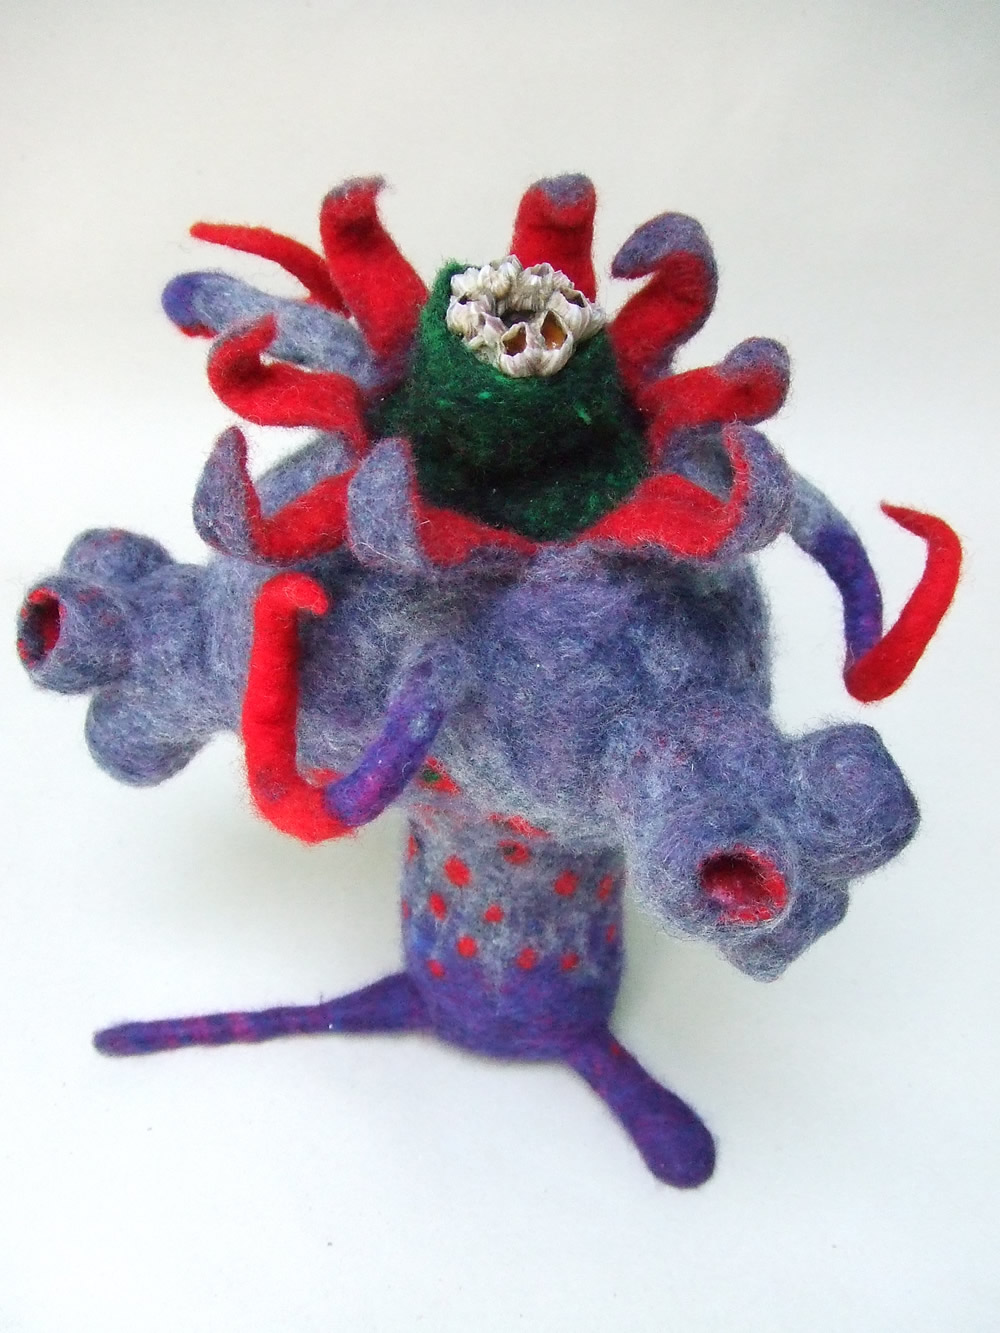
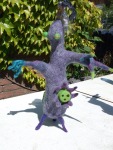
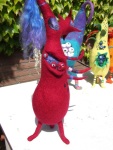
Anyway, here is the sanitised end result. It’s a bit top heavy I think, but, as ever, it was a useful learning experience, in more ways than one. 🙂

barnacles pod3 barnacles pod4 barnacles pod6

Maybe I should just stick to plain ol’ felt barnacles.


Pods workshop with Andrea Graham

I’m just back from another fabulous three-day workshop at Atelier Fiberfusing near Amsterdam in the Netherlands. The atelier is run by Dorie van Dijk and her family, and I attended a workshop by Lisa Klakulak there last year. It’s a fantastic space, with a huge table for each student and plenty of room to move about. Food is plentiful and delicious, sometimes unusual – I’ve never had sauerkraut lasagne before! 🙂 – and though the atmosphere is warm, friendly and laid back, underneath everything is extremely well organised. I can’t recommend it highly enough.

My chosen workshop this year was with Andrea Graham, who makes beautiful sculptural felt. I’ve admired her work for a long time and at one stage wondered about doing a workshop by webcam. But then I saw she was coming to Atelier Fiberfusing, and that was all the excuse I needed!

I’d booked for the three-day workshop on making pods, but before I arrived, there had been two previous workshops on making jewellery and textured surfaces. The results looked really interesting.

pod jewellery pod texture

Andrea had brought along some examples of pods to inspire us.

pod andrea2 pod andrea3

We started by making the core and legs for our pods, then added features such as spikes and resists using needle felting. After covering with the base colour and adding more features we finally wet felted the whole piece.

With 14 students in the class, all experienced felters, the results were incredibly varied, as the photos below show! The first one is mine.

Andrea is a very good tutor. Because of her experience, she can point out where the trouble spots are likely to be in advance, hopefully preventing too much disappointment after a lot of hard work!

I learnt a lot on this workshop:

  • Having done very little needle felting, I now have more respect for what can be achieved with this technique. Not just through what we did in class, but because Ruth Packham, who was staying at the same hotel as me, is an avid needle felter and gave me some inspiration. I still prefer the texture of wet felting though. 🙂
  • I’ve never made spikes before – I equated them with making bag handles, which is a long and tedious process if you just use bubble wrap. But using a bamboo mat is infinitely quicker, as long as the mat is sturdy enough.
  • I’ve never felted with batts, but they are much quicker to lay out. The short fibre merino I got from New England Felting Supply was much admired for the gorgeous mix of colours, and it felted like a dream! However, being used to laying out felt as “shingles” using tops, I had some difficulty in judging how thick the final felt would be when using batts, so some of the prefelt I made was quite thin. Hopefully this will improve with experience.

And of course I made some lovely new friends! 🙂

group shot pods

Looking forward to next year already…