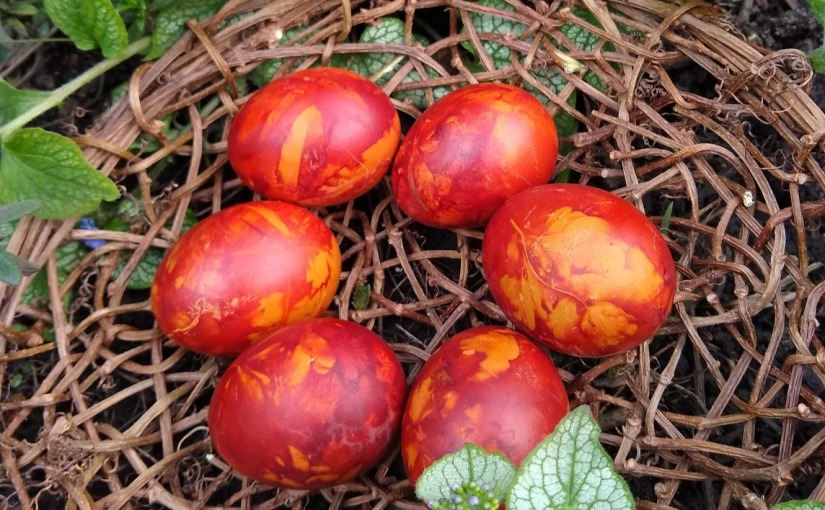
You may remember this little guy I made over a year ago. It was during the first lockdown in April 2020, and we had just started the coiling module at City Lit, when everything closed down.
However, our tutor Polly Pollock continued to have regular weekly Zoom meetings with the group, giving us advice and feedback on our coiling projects, the theme of which was animal markings. My piece was inspired by the radiated tortoise, a critically endangered species from Madagascar.
Fast forward to April 2021, when our college classes resumed in person. We were all asked to bring in our coiled pieces and sketchbooks for assessment.
A few weeks later I heard that I had been one of two students awarded the Christiane Sand City Lit Award for Coiling.
Christiane Sand first enrolled on the City Lit Creative Basketry course in September 2011. After completing it she was diagnosed with cancer and re-enrolled in 2015 as a therapeutic pursuit alongside her cancer treatments. For her coiling project she made a wolf basket, which she found challenging but ultimately rewarding. This is what led her husband Nigel Grant to set up two awards for students who produce outstanding work in the coiling module.
As you can imagine, I’m well chuffed! The prize is £250 to be spent on a basketry course, which will allow me to keep feeding my habit. 🙂
It definitely feels as if spring has sprung. The weather has turned (for now), the garden is a riot of green, and I’m back at college. There does seem to be a sense of hope and renewal in the air – let’s hope it lasts!
Our first sessions back at City Lit are focusing on twining with John Page. We started off using sisal and jute, getting a feel for tension, increasing and decreasing the width, and use of colour.
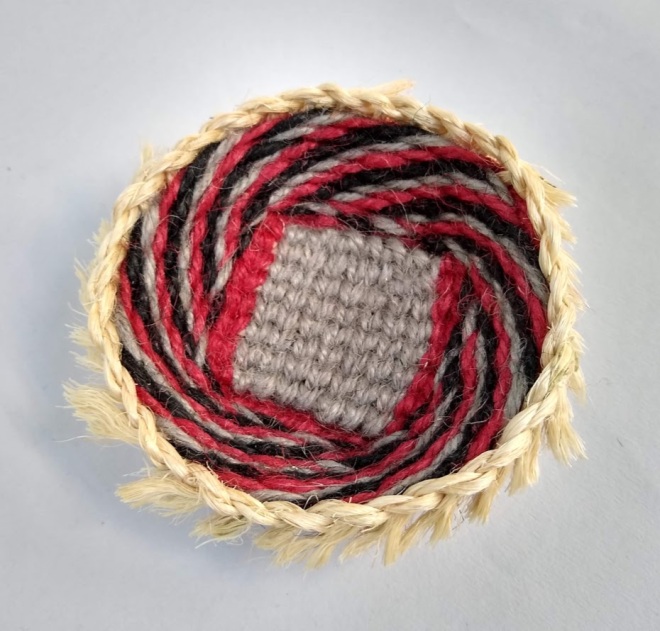
We also looked at an alternative start, the square start, which results in a double-layered base, which can be two different colours. I combined this with waling in three colours, ending up with a bowl where the inside is completely different from the outside.
I also had a go at making a bowl in my signature pattern from discarded telephone wire, begged from phone engineers whenever I pass a junction box.
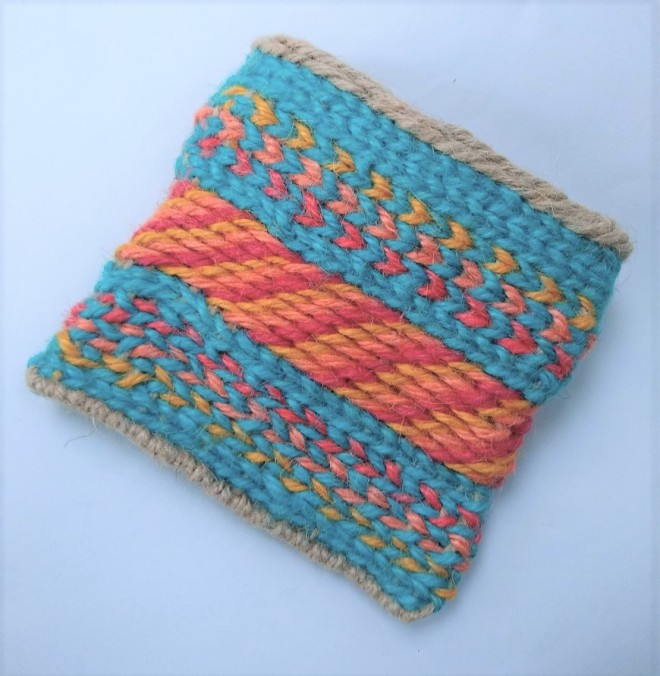
We then moved on to making pouches, where we learned about the tendency for flat pieces to twist, and the importance of using reverse twining to help counter this. It produces a chevron pattern, which adds extra interest.
I also attempted to make a ribbed pouch, by using alternating thick and thin stakes and thick and thin weavers. My hope was that the thin weaver in front of the thin stakes would recede, while the thick weaver in front of the thick stakes would protrude, giving a ribbed effect.
However, this didn’t work out, partly because the last stake on one side is the same thickness as the first stake on the other side, so while the thin weaver will be in front of the thin stake on one side, it will be in front of the thick weaver on the other side! It’s not very obvious from the photos, so you’ll have to take my word for it. However, it does give the stakes more prominence in the overall pattern.
Thin weaver in front of thin stakesThin weaver in front of thick stakes
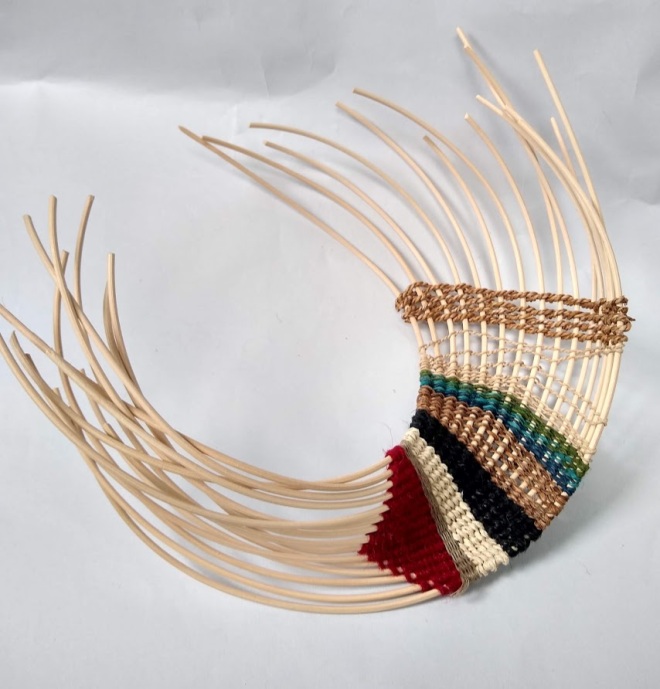
So far we had worked with soft materials. For homework we were asked to make a sample of twining materials on rigid stakes. Nobody said it had to be flat and straight. 😉
I had some cane that was coiled up, so it was curved. I cut out a series of C shapes and twined them together roughly in the centre. I decided not to use reverse twining to see if I could get the piece to twist. And it worked!
Time to try some openwork twining. One of the handouts we were given had various diagrams showing different types of staggered twining, including one over a double warp (“staggered weft twining over double transposed warp” was the actual description). Nothing like jumping in at the deep end, so I had a go.
First I tried a flat piece, which worked fine – once I remembered to keep the warps in the same layers and not to cross warp threads of the same colour.
Then I tried a piece in the round, but I couldn’t get the pattern to work continuously. You can’t see it in the photo below, but the pattern along the edge where the rounds joined is a complete mess. It wasn’t until I gave up and looked more closely that I realised that I needed an odd number of each colour of warp threads – d’oh! When I pulled out one of each thread the pattern did indeed work – though I then had too many twined threads.
So I had another go, this time with odd numbers of warp threads – and it worked. I finished off by twining around the warps from both sides at the bottom to create a pouch. Apologies for the photo – it’s tricky to shoot a two-sided see-through object.
And after all this, I’ve also made progress on the twined Work in Progress I showed you last month. Hopefully by next month it will be finished!
The big news this month is…drumroll…I have finished the Tetrapak dog!
Any suggestions of what to call him or her? 🙂
I also tried a variation on a theme, making a circular coiled pot with a lid based on my previous tortoise vessels. Because the peaks resemble limpet shells, I’ve called this a limpet pot.
Another construction I’ve been involved in was a bike shed in the front garden. This was not particularly creative – I just mention it because it took a lot of time and effort this month! The very heavy shed arrived in bits and had to be pieced together on a concrete base that we had previously laid.
Much huffing, puffing, and swearing ensued, not to mention a couple of broken drill bits. I also ended up falling into wet concrete at one point – and the local wildlife were determined to leave their marks too!
But now the shed is up, and I am able to get into the house without squeezing past a couple of bikes and associated paraphernalia. We just need to plant a fast-growing shrub to cover up the unattractive exterior.
With restrictions on lockdown slowly lifting, our two-year basketry course at City Lit is due to resume in mid-April, more than a year since it stopped. I’m really looking forward to being back in the classroom, especially now that I’ve had my first coronavirus vaccination.
We are going to be starting on twining, so I thought I might try to get ahead a bit and started on a new experiment. This is very much a Work In Progress! 😉
Hopefully this will be more presentable next month.
For the past few weeks my creative mojo has been curled up in a little ball somewhere under the duvet and refused to come out. It started with a relative’s sombre funeral (nothing to do with covid-19) and continued through the agonisingly drawn-out US elections (when all I wanted to do was sit in a corner and knit while watching CNN). Now I just seem to be in a state of general lethargy.
The first lockdown in March/April was quite a fruitful creative period for me. With exhibitions and shows cancelled and no deadlines to meet, I was able to rediscover the joy of creative play and experimentation. This time round it’s a bit different – the thought of a long dark winter with no or few opportunities to meet up with friends, visit exhibitions and restaurants, or travel anywhere is dispiriting, to say the least.
A little light in the gloom was a course in Burkina Faso plaiting with John Page, run over four consecutive Saturdays at City Lit – one of the few remaining courses that was held face to face rather than online. Because it counts as education it was allowed to continue, albeit with perspex screens, copious hand sanitation points and mask wearing.
Henrietta and Jo, two of my cohort from the two-year City Lit basketry course, also attended, so it was good to see them and catch up in person.
Traditionally in basketry you have upright stakes, around which you wind the weavers. But with Burkina Faso plaiting there is no distinction – the stakes and weavers are constantly changing places. And if you use rigid materials, such as cane or willow, it tends to produce a rather lovely spiral. With softer materials, which are easier to manipulate, you can also weave more regular rows.
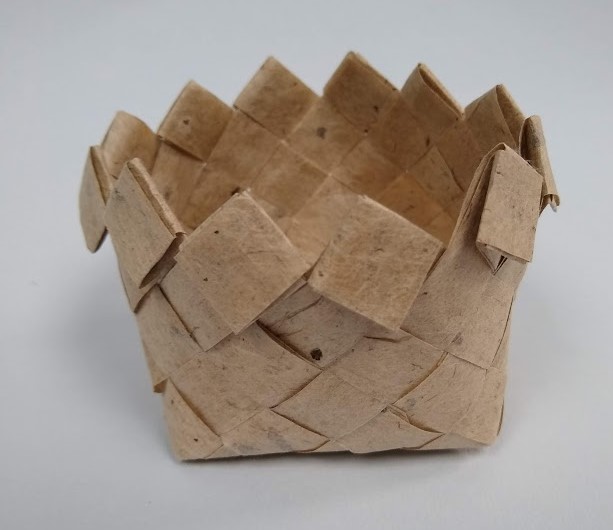
We started with rattan (cane) and soft materials like sisal, to learn the basic technique. Because cane is a regular thickness along its whole length, it tends to form a cylinder, but the ends can be tied off to produce a vessel that could be used as a bird feeder or garlic basket.
Here are some samples made by the group in varied materials, including cane, sisal and telephone wire.
We then moved on to using willow. Because willow rods taper, they naturally form a cone shape. We practised making flat tops and spiral tops.
We also tried making flat-bottomed vessels. Quite a lot of strength is needed here to pull the willow into place!
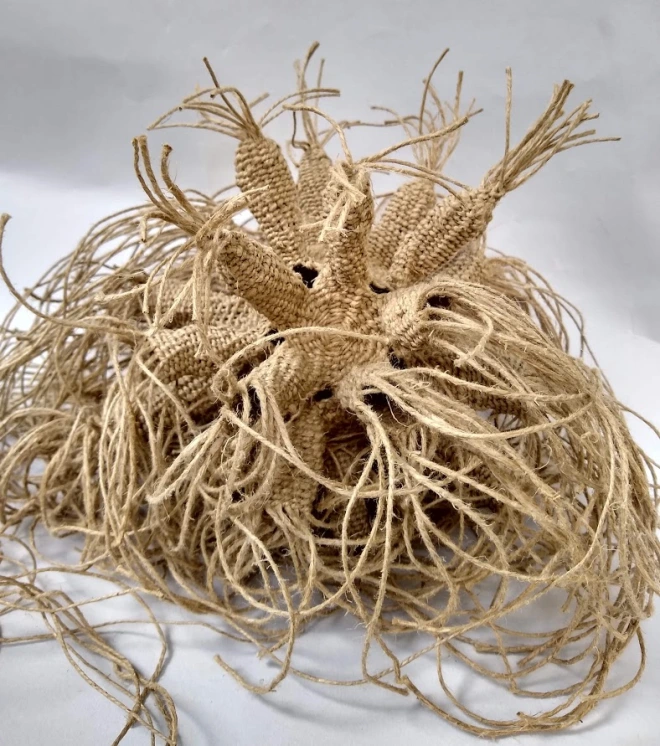
Finally, we worked with rush – first time with this material for us all. It’s strangely spongy but is much easier to manipulate than willow.
I started by making a small rush pouch.
Then in the final week most of us made rush bags.
Learning a new technique or working with new materials is always stimulating, and I could feel my creative mojo starting to stir at last!
Here’s a flat spiral I made using paper yarn.
And I started making a pouch from telephone wire.
But then it wanted to turn into another spiral – so I let it!
Then I had another block – what to do with the ends? The consensus on Instagram was to leave them loose and wild, but they were rather long, and the piece just didn’t feel finished to me. Then someone suggested bending the spiral outwards to create a double-walled vessel. This was slightly tricky, as it meant I would have to plait in reverse. I couldn’t work out how to do that, so I had to plait from the inside looking through the other side of the basket.
But I was pleased how the piece finally resolved itself in a sort of jellyfish form. And I left the ends free, so managed to have my cake and eat it! 😉
I said last week that I would post more information about the coiling project I’m working on for my City Lit basketry course. The original deadline to finish was today, but because the course is currently on hold, the deadline has been extended indefinitely. Just as well, because I haven’t finished yet! 🙂
I’ve been working on the project in fits and starts over the past eight weeks. There’s been a lot of sampling to get the effect I want, but I think I’ve finally nailed down the materials and techniques to use.
The theme of the project is animal markings. From the start, perhaps leading on from the pattern on the cane platter I made, I was attracted to the radiated tortoise (Astrochelys radiata) and Indian star tortoise (Geochelone elegans). Both are endangered species.
Radiated tortoise
Indian star tortoise
It’s not just the pattern – it’s the domed form of the individual parts of the shell (called scutes) that appeals. My plan was to make several individual units and then join them together to create the shell.
Looking at the shapes of the individual scutes, I could see that the central ones were hexagonal, while those at the edge had five or four sides.
I made the first samples with raffia, both with a wrapped core and an exposed core. I decided I really don’t like wrapping with raffia – it always seems to fray, and it feels quite plasticky. Shame, because raffia comes from Madagascar, like the radiated tortoise!
I liked the idea of an exposed core evoking the concentric ridges of a tortoise shell, but it was tricky getting a defined pattern this way.
I also toyed with the idea of creating a more openwork shell, to represent the fragility of such an endangered species. But this came out more domed than conical – more like a jellyfish – so although I loved the effect I decided to put that in the box labelled “Ideas to pursue later”.
Then I moved onto working with a solid core, using sash cord wrapped with knitting yarn. The pattern here was very distinct, and though this started as a sample I couldn’t help myself and carried on to make a complete bowl (as reported in Lockdown week 3).
The scale of this was too large for my tortoise (unless I swapped to a giant tortoise!), so I replaced the core with thinner string plus copper wire (to help shape the pieces) and started experimenting with different wrapping materials – soft string, fine hemp, linen thread.
In the end, I concluded that the finest pattern was obtained using linen thread (shown in the sample at the back in the photo above). The wire in the core enabled me to shape it into a hexagon.
Next was the problem of how to join the individual units. The first samples I made had no border, so the edges were a mixture of black and neutral stripes.
I tried joining them together with figure of eight stitch in neutral thread, but this looked messy against the black. Overstitching was less messy but somehow too intrusive.
So I made more samples with the outermost round entirely in neutral-coloured thread, and joined these with figure of eight stitch, which was much neater.
I then joined all the samples I had made together to test out how an overall border, enclosing them all, would work.
The joining on these samples isn’t very neat, for the reasons explained above. But I learned two things from joining them all together.
The overall border will undulate because the angles where the individual scutes meet is not sharp. I don’t mind that – in fact, I think it adds more movement and fluidity.
With three central hexagonal scutes (as in the page from my sketchbook above), the overall shape would be disproportionately long and thin. So the final piece will have only two central hexagons. This will mean making 10 individual units rather than 13.
Phew! Just have to make it now. And as I envisage this being the lid of a box, there’s still all the planning to make that work. More to come!
The first half of this term’s basketry course at City Lit focused on working with cane, with Polly Pollock. Many of the stake and strand techniques that we used are similar to those we learnt when working with willow last term, but subtly different.
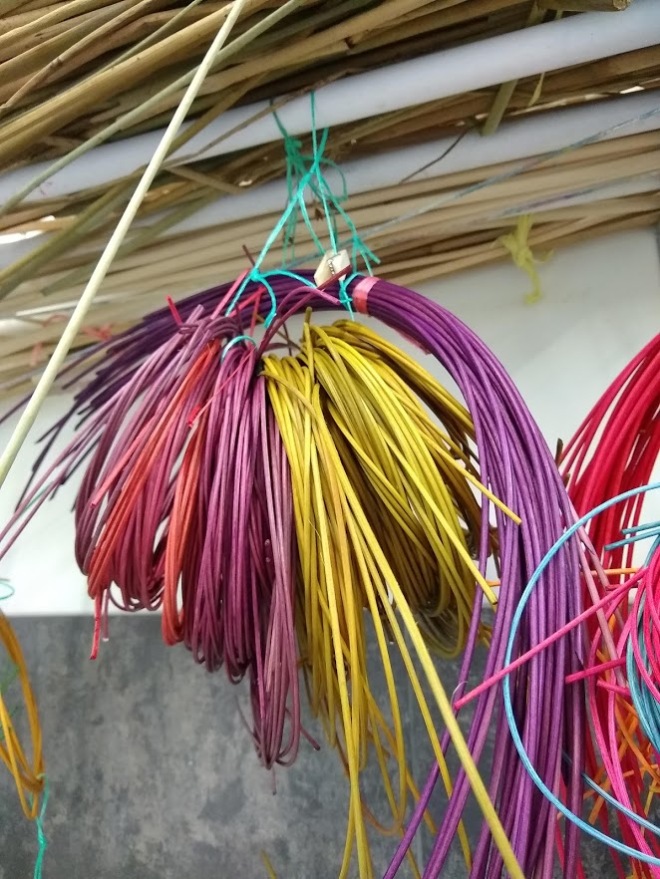
After learning how cane is grown and harvested, we started with dyeing, using Rit dyes. Initially we were very careful to use different bowls for every colour, but by the end we were dipping the cane with abandon into many colours (or was that just me?). 😉
These dyed samples were only for experimenting with, so for once I moved away from my normal palette into shades of raspberry and pistachio.
To learn the basic techniques, we used discs of MDF pre-drilled with holes rather than making a base, which was a lot quicker!
We used these to practise stepping up, packing and waling.
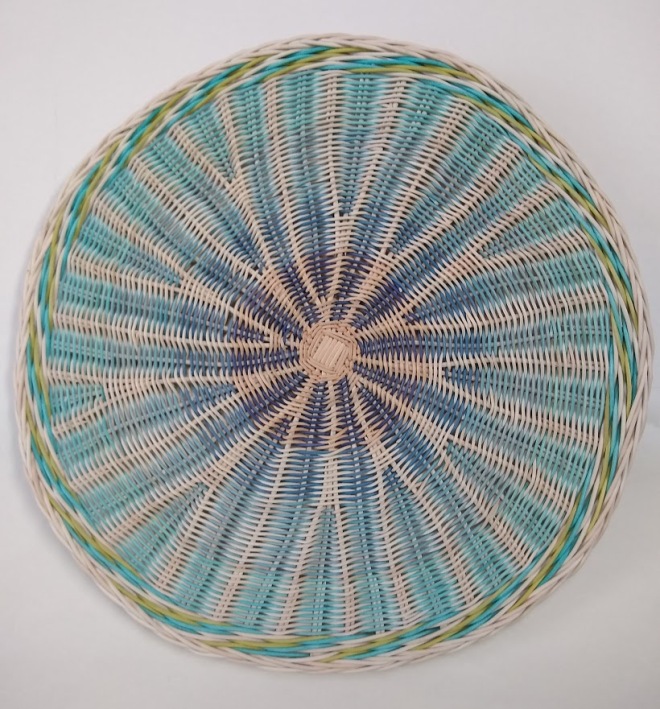
Polly likes to set a project for each module, and the theme of this one was to make a cane platter inspired by aerial photography. I played around with a few ideas, but was most attracted by the patterns formed by mountain ridges.
This didn’t involve packing and waling, but relied on pairing using weavers of different colours. Because the platter was worked from the centre, we would have to add more “spokes” as it grew, and this design would also make a virtue of this necessity, as the spokes are an integral part of the pattern. I thought I also might be able to create texture by varying the tension or using weavers of different thicknesses so that the spokes sat higher than the background.
To test out the idea I worked a couple of samples – which was very useful.
Having ascertained that the technique was feasible, it was on to the real thing. For this I reverted to my normal colour preference!
Unfortunately, I made a couple of elementary mistakes in the planning.
First off, I completely forgot to leave half the weaving cane undyed. So I had to use another batch of undyed cane, which was a slightly different shade (you can see this in the photo below).
Then I added too many spokes too soon, forgetting that they had to be a minimum distance apart of 2cm at the border. So I had to undo a large chunk of weaving to remove spokes I had added, to insert them at a slower rate.
Still, the platter made progress.
We finished off with a few rows of waling to hold everything in place before adding the border. Here I sneaked in a bit of the pistachio cane I’d dyed for the samples.
It was a big learning curve but I’m pleased with the final result.
I think it could be interesting to do a monochrome version using undyed cane (all the same colour!) and just dark blue – what do you think?
Last week we finished the first module of the two-year basketry course at City Lit. The subject was plaiting, and the tutor was Polly Pollock. I missed the first week because I was on holiday in Uzbekistan, so as soon as I got back it was straight into a marathon strip-cutting session!
We started off with watercolour paper, as it is strong but flexible. However, we were encouraged to experiment with other materials and also to add overlays (extra elements threaded through after weaving the main basked) to add colour and texture.
The three main techniques we covered were bias plaiting, straight plaiting and skewed forms. We combined these with different borders – zigzag, flat and sandwich and sew.
Here are some of my practice samples made with bias plaiting using khadi paper, an old map, newspaper cordage and vinyl wallpaper.
Here’s a straight plaited vessel made with watercolour paper.
And here’s a skewed vessel, also made with watercolour paper.
For our final module assignment we had to make a series of three related pieces using some or all of these techniques, inspired by the modern architecture of Rotterdam.
I have to admit that this was a bit of a challenge for me, as my inspiration usually comes from natural rather than human-made forms. But even I got drawn in by the weird and wacky architecture of this Dutch city.
Here are the results, all made with watercolour paper, damp proof membrane and flattened corrugated cardboard.
I have to admit that the third piece, of a vessel within a vessel, was actually inspired by another building in London, and its spiky “haircut” was just a piece of whimsy on my part (though I could argue it’s supposed to be a roof garden 😉 ). It’s also not really tall enough, but I ran out of paper and time as it had to be finished for evaluation last week.
I really enjoyed this first module. It was quite intense – and hard work cutting all the strips! – and moved me out of my comfort zone.
This week we move on to willow, which I suspect will also be challenging!
In a previous post I mentioned a course on coiled basketry I was taking with Polly Pollock at City Lit and described the different samples I had made.
The second half of the course focused on our own personal projects, developing the techniques we had learned to produce a piece or series of samples inspired by the seedpod theme.
My inspiration actually came from a piece of driftwood.
It reminded me of a sycamore (US: maple) seed, so I thought I would try to weave something around it to create the “wings”.
At first I tried wrapped linear coiling with paper yarn, but it felt too solid and heavy – this was supposed to represent a floating, spinning seed.
So then I tried a more open weave approach, using blanket stitch with cordage, still with paper yarn. This worked better but was a bit too large.
I tried changing materials, using a thinner cordage and enamelled wire for the blanket stitch. This was much better!
There was still more experimenting to be done with varying the tension of the stitch to evoke the marks and form of the seed, but I finally got started.
Finally, the finished piece:
As ever, it was fascinating to see the very different pieces that everyone produced. I don’t have permission to post photos of others’ work, so you’ll have to take my word for it! But it was a fantastic course and I would highly recommend it.
There is also an exhibition coming up of work by students who are completing the two-year City Lit diploma in basketry. It’s at the Espacio Gallery in London from 23 to 28 July. I’ve seen some of the work on Instagram and it looks well worth a visit!