First Time Felting review

There are many craft books around these days that are project-led, showing pretty things that you can make once you’ve mastered a particular technique. These are great for inspiration and showing beginners what they can aspire to – but they can also be frustrating if they skimp on technique in favour of result.

first time felting by ruth lane

So it’s refreshing that First Time Felting: The Absolute Beginner’s Guide by Ruth Lane prioritises technique above all else. I think this is particularly important with felting, where even the apparently simple process of pulling off a small piece of fibre from wool tops can be tricky.

I should declare an interest here. I’ve never met Ruth Lane in person, but we follow each other’s blogs and I have written guest posts for the Felting and Fiber Studio, for which she is one of the co-ordinators. But the review below is my honest opinion.

The book is divided into needle felting and wet felting – sensible, as they are completely different techniques. Each process is broken down step by step with accompanying photos, making it very easy to follow.

Throughout the book Ruth also gives extra tips on technique, highlighted in tinted boxes. These cover everything from how to remember which way you turn the felt to blocking the finished piece so that it holds its shape.

It starts with an overview of different types of wool and embellishments, which is very helpful, though perhaps a photo showing the difference between wool batting and wool tops might have been useful for beginners (there is an extensive glossary at the back that explains all the terms used).

first time felting

I would also like to have seen a mention of Bergschaf wool, which is popular in Europe (and increasingly popular in the UK), but maybe this is difficult to source in the US.

There is essential health and safety advice – not just on how to avoid stabbing yourself with a felting needle, but on posture (avoiding hunching) and working on the correct height of table when wet felting. Many felters suffer from back problems, so it’s important to try to develop good habits from the outset.

I’m obviously not an absolute beginner when it comes to wet felting, but the book starts with needle felting, a technique that I use only occasionally, usually for covering a wool core. And then I usually wet felt it afterwards. 😉

So I learnt a lot from this section, from how to make a flat shape to deep needling attachment techniques and how to make bendable joints. For more advanced shaping Ruth also covers felting around a wire armature and string jointing, using a teddy bear as an example.

The section on wet felting is equally comprehensive, covering the basics like laying out, wetting down, the pinch test and rolling. I also learnt for the first time about palming – so even experienced felters can get something out of it!

There is also advice on special techniques for nuno felting, dealing with edges and seams, and mosaic or collage felting.

In short, this is a book that offers beginners a solid grounding in felting techniques – and even more experienced felters may learn a thing or two!

First Time Felting is published by Quarto Books and costs £12.99. But if you’re quick they’re running a giveaway over on Felting and Fiber Studio, so you could win your own copy!

Pods workshop with Andrea Graham

I’m just back from another fabulous three-day workshop at Atelier Fiberfusing near Amsterdam in the Netherlands. The atelier is run by Dorie van Dijk and her family, and I attended a workshop by Lisa Klakulak there last year. It’s a fantastic space, with a huge table for each student and plenty of room to move about. Food is plentiful and delicious, sometimes unusual – I’ve never had sauerkraut lasagne before! 🙂 – and though the atmosphere is warm, friendly and laid back, underneath everything is extremely well organised. I can’t recommend it highly enough.

My chosen workshop this year was with Andrea Graham, who makes beautiful sculptural felt. I’ve admired her work for a long time and at one stage wondered about doing a workshop by webcam. But then I saw she was coming to Atelier Fiberfusing, and that was all the excuse I needed!

I’d booked for the three-day workshop on making pods, but before I arrived, there had been two previous workshops on making jewellery and textured surfaces. The results looked really interesting.

pod jewellery pod texture

Andrea had brought along some examples of pods to inspire us.

pod andrea2 pod andrea3

We started by making the core and legs for our pods, then added features such as spikes and resists using needle felting. After covering with the base colour and adding more features we finally wet felted the whole piece.

With 14 students in the class, all experienced felters, the results were incredibly varied, as the photos below show! The first one is mine.

Andrea is a very good tutor. Because of her experience, she can point out where the trouble spots are likely to be in advance, hopefully preventing too much disappointment after a lot of hard work!

I learnt a lot on this workshop:

  • Having done very little needle felting, I now have more respect for what can be achieved with this technique. Not just through what we did in class, but because Ruth Packham, who was staying at the same hotel as me, is an avid needle felter and gave me some inspiration. I still prefer the texture of wet felting though. 🙂
  • I’ve never made spikes before – I equated them with making bag handles, which is a long and tedious process if you just use bubble wrap. But using a bamboo mat is infinitely quicker, as long as the mat is sturdy enough.
  • I’ve never felted with batts, but they are much quicker to lay out. The short fibre merino I got from New England Felting Supply was much admired for the gorgeous mix of colours, and it felted like a dream! However, being used to laying out felt as “shingles” using tops, I had some difficulty in judging how thick the final felt would be when using batts, so some of the prefelt I made was quite thin. Hopefully this will improve with experience.

And of course I made some lovely new friends! 🙂

group shot pods

Looking forward to next year already…

Chelsea MA Textile Design show 2013

Given its rich textile history, it’s no surprise that India was a common source of inspiration for this year’s MA students of textile design at the Chelsea College of  Art and Design Postgraduate Show.

The work of Kathryn Lewis particularly appealed, as her collaboration with Jabbar Khatri, an artisan based in Gujarat, used bandhani binding to shape garments, resulting in textures not dissimilar to nuno felting. Not very practical, perhaps, as the knots are left in, but a nice example of bandhani being used for form rather than pattern.

Kathryn Lewis

Kinza Foudil Mattoo displayed some contemporary adaptations of traditional ajrak block printed fabrics, based on a trefoil motif, using digital printing.

ajrak1

Upcycling/using waste or found materials was another common theme. My favourite pieces here were by Kaixi Lin. Inspired by Japanese boro – heavily patched and repaired indigo cloth – she collected discarded clothing from her family, and unravelled and reused the yarns to weave new fabrics.

KAIXI LIN

Lucinda Chang combines textiles and ceramics. Inspired by coral after a visit to the London Aquarium, she knitted, crocheted or stitched waste textiles into underwater forms before dipping them into casting slip.

lucinda chang

Zahra Jaan went to the other extreme, producing disposable fashion that you wear two or three times and then throw away. Made from airlaid paper  (described as “fluff pulp bonded with air”), these boldly patterned garments and their packaging are completely biodegradable.

zahra jaan

Maria Afanador Leon‘s impossibly delicate crocheted pieces were stimulated by her concern for the fragility of culture and nature and the environmental issues related to consumption.

maria afanador leon

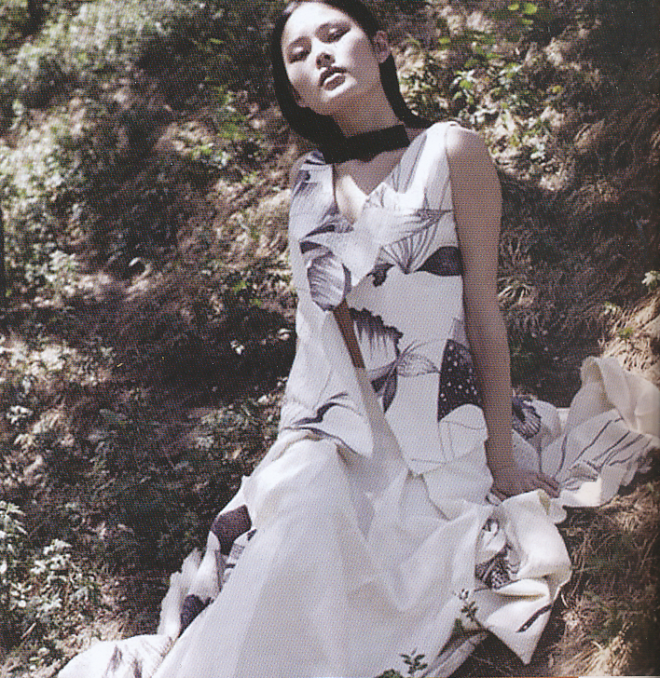
Judging by the names, there was a big Chinese contingent on the course – around a third of the students by my reckoning. Yijin Sun focused on her Chinese heritage with a selection of monochrome garments with interesting pleats and prints that looked as if they had been created in a heat press.

Yijin Sun

Yuning Wang’s innovative weaving with a metal weft resulted in garments that wearers can shape themselves.

Yuning Wang

Finally, Lin Zhu‘s charming needlefelted creations gave a certain oriental twist to a technique that I don’t normally associate with China.

Lin Zhu

The Chelsea Postgraduate Summer Shows run until 12 September.

Felt corsage

A few weeks ago at Making Uncovered, when I was demonstrating how I make felt pots and purses, one of the visitors asked if I could make her some felt flowers to wear on her coat. I said that a corsage would be no problem, and helped her to pick out the colours she liked.

She then drew a sketch for me of what she required, and it turned out that she wanted three flowers of different sizes on stalks, along with two leaves.

This, I discovered, was trickier. The flowers couldn’t be too large, as the size of the overall piece would be enormous and the stalks wouldn’t be able to support them. I used three layers of felt for each flower head, but working on this relatively small scale was a bit fiddly.

After that I made the stalks and leaves, which I managed to felt together without problems. Attaching the flower heads to the stalks was more challenging – a felting needle, together with conventional needle and thread, came in handy here.

felt corsage felt corsage felt corsage

The final difficulty was where to attach the fastener. Putting it on the thickest part of the stalk didn’t work, as the weight of the orange flower meant it tended to flop over slightly. In the end I sewed on two fasteners – one on the back of the orange flower and one on the stalk.

felt corsage

Let’s hope the customer likes it – and doesn’t change coats too often! 😉

Wool packaging

A friend of mine used to get deliveries of fruit and veg boxes from Abel & Cole, but then stopped. Some of the items she ordered were kept chilled using insulated packaging made from layers of lightly needle felted wool encased in plastic, made by the Wool Packaging Company. She wasn’t sure what to do with them but felt guilty about throwing them away, so she asked me if I’d like them.

According to the company’s website, after washing and scouring the wool is garneted and then needle felted. When I removed it from the plastic cover, it looked like a fairly delicate prefelt made from various different fibres running in different directions. Some of the fibres were fairly coarse, a bit like Icelandic but not as long, and the colours included the whole range of natural shades, from cream to brown, but mostly shades of grey.

It was also fairly thick, so I tried to separate it into two layers so that I could felt only half the thickness. And because it hadn’t been carded for making textiles, there were still a few burrs and other bits of vegetation present, which I picked out.

After wetting down and adding soap, I rubbed and rolled as normal, and it started to felt quite well. When I rubbed it on the washboard, many of the coarser fibres dropped out – similar to felting with Icelandic and Norwegian wool. In the end it shrank by around 20%.

Left: before felting; right: after felting

The final felt is quite coarse and hairy, and even when it’s dry it tends to shed a lot of fibres. However, the colours are lovely and organic. It’s too rough to use as a scarf or anything wearable, but I think that small areas could add some interesting texture with other fibres. Some judicious shaving might be required though!

Here’s a sample of white merino with some patches of prefelt.